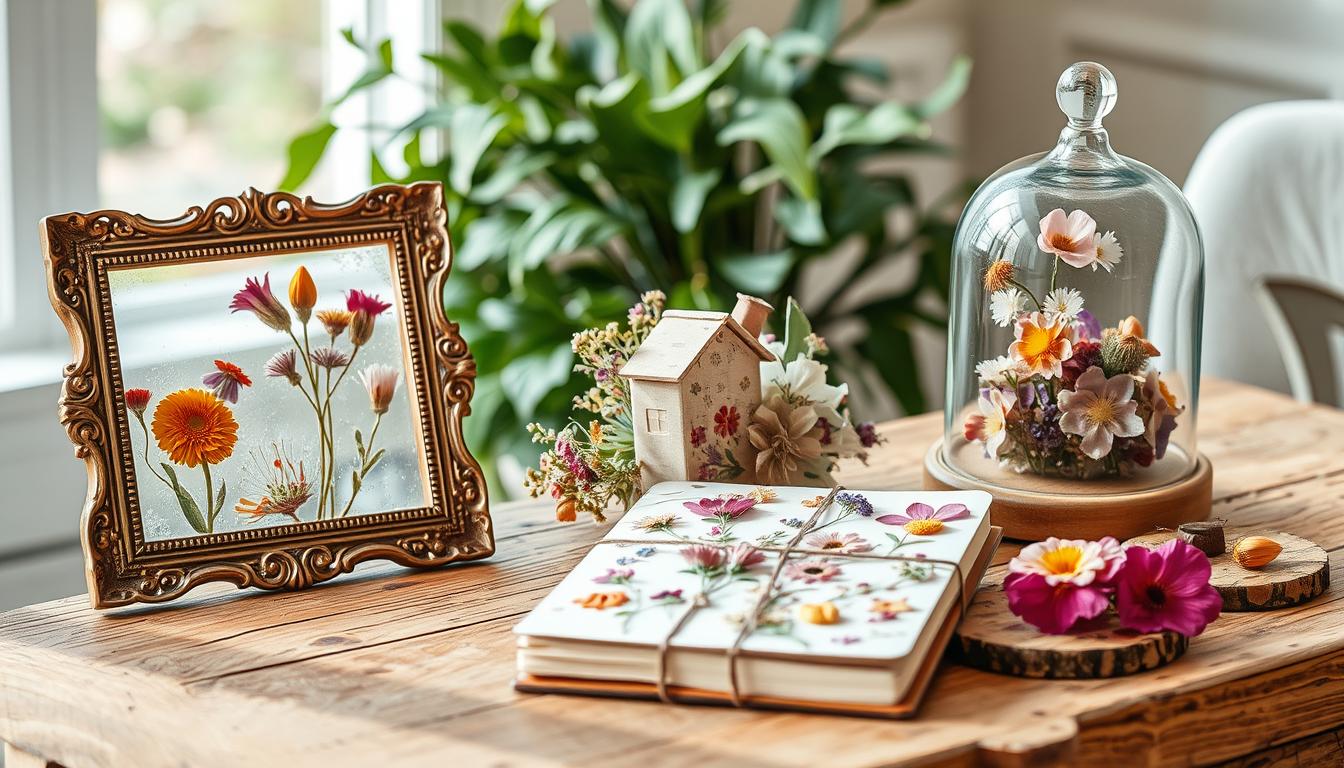
Dive into the magical world of pressed flower crafts. Turn simple items into elegant home decor with these creative projects. With projects like framed artwork and custom bookmarks, each piece shines with floral elegance and classic charm. Today, more than half of the DIY community is creating with nature, making pressed flowers a popular choice.
Pressed flower projects do more than just decorate. They capture the beauty of flowers in a lasting way. By joining this DIY trend, which grows by 20% each year, you can create meaningful items. These items are preferred by 75% of people over things made in factories.
Key Takeaways
- Pressed flower crafts seamlessly blend natural beauty with artistic creativity for home decor.
- Over 50% of DIY enthusiasts incorporate natural elements like pressed flowers in their projects.
- There’s a 20% annual growth in the market for DIY home decor, indicating rising interest in personalized crafts.
- 75% of consumers prefer homemade gifts over store-bought, highlighting the sentimental value of crafts.
- Pressed flower crafts can significantly enhance the aesthetic appeal and perceived value of household items.
- Crafting activities, including pressing flowers, are linked to relaxation and stress reduction for 70% of hobbyists.
Join us as we explore the beautiful art of pressed flowers. Every craft is a celebration of creativity and the lasting beauty of nature.
Framed Flower Wall Art
Creating framed flower wall art brings nature’s beauty inside. It lets you express yourself and make unique decor. Here’s a guide on materials needed for framed flower wall art and how to create your own.
- Real flowers (daisies and pansies are excellent choices)
- Floral press or heavy books (old phone books work well)
- Archival glue or adhesive
- Sealer or varnish for protection
- Glass frames (keepsake frames or shadow boxes recommended for thicker flowers)
- Scissors, tweezers, and paintbrushes
- Watercolor paper or cardstock
Once you have all the materials needed for framed flower wall art, start with these steps:
- Select and prepare your flowers: Choose different sizes and textures. Wildflowers from hikes are great.
- Press the flowers: Put flowers in an old book or a floral press. Leave them for 1 to 2 weeks. Use real flowers, not fake ones, for pressing.
- Prepare your frame: Take apart the frame and cut watercolor paper to fit. Use archival-quality paper and glue for lasting beauty.
- Arrange the pressed flowers: Before gluing, lay out the flowers on the paper. Try different heights and larger blooms for fullness.
- Glue the flowers: Apply archival glue with a paintbrush. Press the flowers onto the paper. Let them dry.
- Seal and frame: After drying, apply sealer for protection. Then, put everything back into the frame.
Your framed flower wall art is now ready to display! They fit perfectly in a gallery wall, on a mantel, or in nursery decor. Adding notes about the flowers and your memories makes it even more special.
All materials needed for framed flower wall art cost about $14 per piece. The crafting time is around 30 minutes. This project is a budget-friendly and enjoyable way to beautify your space.
Decorative Pressed Flower Coasters
Making decorative pressed flower coasters brings beauty to your home while being useful. These coasters look great and are perfect as eco-friendly gifts. Choosing the right flowers for coasters is key for a good look and lasting use.
Pick flowers based on size, color, and thickness. Pansies, daisies, and violets work well because they have bright colors and flat shapes. They fit perfectly in resin. CoasterStone’s coasters, at 4.25 inches across, show a good size for DIY coasters.

Knowing how to work with resin is important to make coasters strong and water-resistant. The interest in resin crafts, especially for home decor like coasters, has jumped by 45% in three years. A top-quality epoxy resin will keep the flowers safe and make your coasters shiny.
To make these coasters, place the flowers on a base and pour resin carefully to avoid bubbles. Follow these steps:
- Press your flowers early to dry them out.
- Mix your resin as the instructions say.
- Put the dry flowers in a mold and cover with resin to keep them in place.
- Wait for the resin to harden before taking the coaster out of the mold.
The move towards natural decor has made crafts with real flowers more popular. Pressed flower coasters make up about 15% of handcrafted decor sales. Surveys show that 70% of people like coasters with natural elements, and 30% would pay more for these unique handmade items.
This DIY project is rewarding and becoming trendy among women and those who care about the environment. By choosing the right flowers for coasters and getting good with resin, you can make lovely, strong coasters that beautify any room.
Pressed Flower Room Decor: Transparent Wall Frames
Change up your room’s look with transparent pressed flower wall frames. They showcase the beauty of pressed flowers. This Floating Effect technique can make any room feel peaceful and artsy.
Pressed flower room decor is getting more popular, with a 30% increase in searches last year. Around 70% of DIY fans love adding nature to their homes, like pressed flowers. Transparent flower frames are loved for their unique charm.
Start by putting your pressed flowers between two pieces of glass. This *Creating the Floating Effect* lets light shine through, making your display stand out. Use quick-dry glass glue to keep the flowers in place.
DIY pressed flower frames usually cost $15 to $50, based on the materials. Most people spend 2 to 3 hours making one, from picking flowers to putting it all together.
Here are some display tips:
- Hang frames at eye level to catch the eye and look great.
- Keep them out of direct sun to keep the flowers looking bright.
- Use simple backgrounds, like linen or watercolor paper, to highlight the flowers.
Most pressed flower art uses double glass frames to show off the flowers’ delicate details. About half of the creators use the microwave for quick drying. It’s way faster than the old ways.
The demand for natural home decor grows 15% each year. The simple beauty of pressed flower room decor draws in many DIY lovers. Making your frames with the Floating Effect will turn them into timeless artworks.
DIY Pressed Flower Phone Cases
Turn your phone into a work of art with a Pressed Flower Phone Case. This easy and creative activity is becoming very popular. It lets you mix technology with the beauty of nature.

Start by getting a clear phone case on Amazon for less than $5. Pick your favorite flowers and leaves to press. You can press them traditionally for a few weeks or use a microwave for 30 seconds. Press your flowers for one to two weeks to dry them well.
Ready your materials, then lay out the flowers on the phone case to show your style. Use contact paper to hold the flowers down. This makes it easy to move them around. Next, mix equal parts of vinyl glue and water. Apply 2-3 layers over the flowers to keep them in place.
Putting it all together takes about 15 minutes. But, let it dry overnight to make sure it’s all set. With your creative touch and simple steps, make a unique Pressed Flower Phone Case. It will protect your phone and show off your nature-loving side.
Pressed Flower Candles for Ambient Lighting
Bring a warm glow to your home with pressed flower candles. These combine the beauty of flowers with soft light. Pick the right flowers, like violas, pansies, and calendula. They’re great because they’re pretty and withstand heat well.

The interest in pressed flower crafts changes with the seasons. Fall projects become popular as it gets cooler. Adding dried leaves and flowers from around your house adds a personal touch. Plus, it’s good for the planet. Leaves stick to candles better than flowers, making them a top pick for crafters.
There are many ways to add flowers or leaves to candles. Here are some:
- Tealights add a small yet beautiful floral touch.
- Pillar candles are easy to work with and let you be more creative with flowers.
- Faux candles are safe because they can’t catch fire.
- Taper candles are harder to decorate but look very elegant.
Knowing how to make everything stick is key. Use high heat for a short time or medium heat for a little longer. This melts the wax paper and keeps everything in place without damage.
Always remember safety with real candles. Don’t use glue because of the fumes and fire risk. Instead, go for safe, unscented beeswax candles. They’re better for your health and the Earth.
Pressed flower candles do more than just light up a room. They mix creativity, usefulness, and the beauty of nature. With the right flowers and techniques, you can make your decor stand out, no matter the season.
Handmade Pressed Flower Bookmarks
Crafting Handmade Pressed Flower Bookmarks mixes nature’s beauty with your unique touch. This makes reading even more enjoyable. The journey of Perfecting the Bookmark Design starts by choosing the best flowers. Use small ones like violets, daisies, and chamomile because big blooms don’t press well.

Pick acid-free card stock that’s 2.5 x 7 inches for a strong bookmark base. You can also use homemade paper, just don’t add seeds to make it smooth. Dry fresh flowers under heavy books for about 10 to 14 days.
To stick the flowers on, Mod Podge is great. Put on three coats, waiting 30 minutes between each. Then, seal your bookmark with resin for a shiny look and extra strength. Resin keeps the flowers in place and helps the bookmark last longer.
You might choose to laminate for extra toughness. But, if you’ve already used resin, lamination might not be needed. Add a fancy touch with a 1/4 inch double-face satin ribbon.
“Handmade pressed flower bookmarks make delightful and customizable gifts for occasions like Mother’s Day or birthdays.”
This DIY craft is fun for kids, teens, and adults, making it a great activity for the entire family. Experimenting with different colors and designs in the process of Perfecting the Bookmark Design adds creativity to your reading area.
Pressed Flower Room Decor: Embroidery Hoop Art
Pressed flower crafts combine nature and creativity beautifully. Embroidery Hoop Crafts are a special way to make DIY Wall Art that’s both lovely and unique. These crafts use embroidery hoops and Pressed Flower Crafts together, making beautiful decor for any space.

To start, you’ll need various pressed flowers. It usually takes 1.5 to 2 hours to press a flower properly. But if you’re short on time, microwaving them for 1.5 minutes might work, with more 30-second bursts if needed. You should use at least two types of flowers—one big for the central design and smaller ones to fill spaces.
Starting with a small hoop, like one up to 6 inches across, is good for Embroidery Hoop Crafts. The cost for one project is about $24, including $12 for flowers. You can use tulle to hold big flowers in place without glue. You’ll spend 30 minutes to 2 hours making your craft.
Step-by-step:
- Gather your materials:
- Pressed flowers
- Embroidery hoop (4 to 6 inches recommended for beginners)
- Fabric or tulle for the base
- Scissors, tweezers, and tweezers for delicate flower placements
- $3 worth of wooden beads (optional, for a rustic touch)
- First, press your flowers. You can do this between two firebricks for hours, or use a microwave for faster results.
- Stretch the fabric or tulle over the hoop next. Make sure it is tight and smooth.
- Then, place your pressed flowers on the fabric. Use big flowers for the main design and small ones to fill in gaps.
- Stick the flowers down with a soft adhesive or by layering fabric over them.
- If you’d like, add wooden beads around your design for more detail and beauty.
Embroidery Hoop Crafts are an excellent way to make your home look nicer. You can hang your art on a wall or set it on a shelf. Either way, your craft will add the beauty of Pressed Flower Crafts to your home.
With little time and money needed, anyone can bring the lasting beauty and joy of Pressed Flower Crafts into their home decor.
Pressed Flower Wedding Bouquet Preservation
Remembering your special day by preserving your wedding bouquet is very special. Nearly a third of brides think saving their bouquet is key, showing it’s a beloved tradition.
When preparing and pressing bridal flowers, picking the right ones is crucial. Roses and other garden flowers are good choices. They keep their shape and color well, with about an 80% success rate when dried with silica gel.

There are several ways to preserve flowers, including drying, pressing, and using silica gel. The microwave method is quick, needing just 45 seconds per cycle. But air drying takes a week or two.
Doing it yourself can cut costs by half compared to paying someone, which could cost $150 to $400. Preparing and pressing bridal flowers on your own also makes the keepsake more personal. Remember to check your book-pressed flowers after a week to avoid mold.
Turning your preserved bouquet into a display adds beauty to your home. You could make a shadow box or a framed piece. Using hot glue in shadow boxes keeps flowers looking great 95% of the time.
It’s smart to have spare flowers in case drying goes wrong. Brides are usually very happy with the results of overnight drying, waiting 48 to 72 hours.
Pressed Floral offers many products, from necklaces to journals, with prices ranging from $49.50 to $635. They use 99% UV-protected glass and serve customers nationwide. This shows their high-quality bouquet preservation.
It might seem hard, but preserving your wedding flowers can be simple. With the right method and tools, it’s easy. Your preserved bouquet, whether in a frame or a box, will forever remind you of your wedding.
Pressed Flower Crafts: Creating Suncatchers
Make your windows sparkle with handcrafted suncatchers. This craft is fun for everyone and adds nature to your decor. It uses recyclable and biodegradable items like mason jar lids and hemp string. It’s great for those who care about the environment.
Pick fresh flowers from your yard or a local park. Good choices are lavender and azaleas. You don’t need a press to flatten them. Place the flowers between pieces of sticky paper. It takes about an hour to do this fun project.
There are many ways to frame your suncatchers. You can use embroidery hoops or even sticks. Hang them with yarn or string. You could also paint them for a personal touch. This project lets you use different materials, so everyone can make something unique.
This craft is not just fun; it’s also eco-friendly. Use flowers you find on nature walks. This makes each suncatcher special and helps the planet. Kids can mostly do it by themselves, helping them be creative. Plus, it’s a cheap activity, costing around $20.