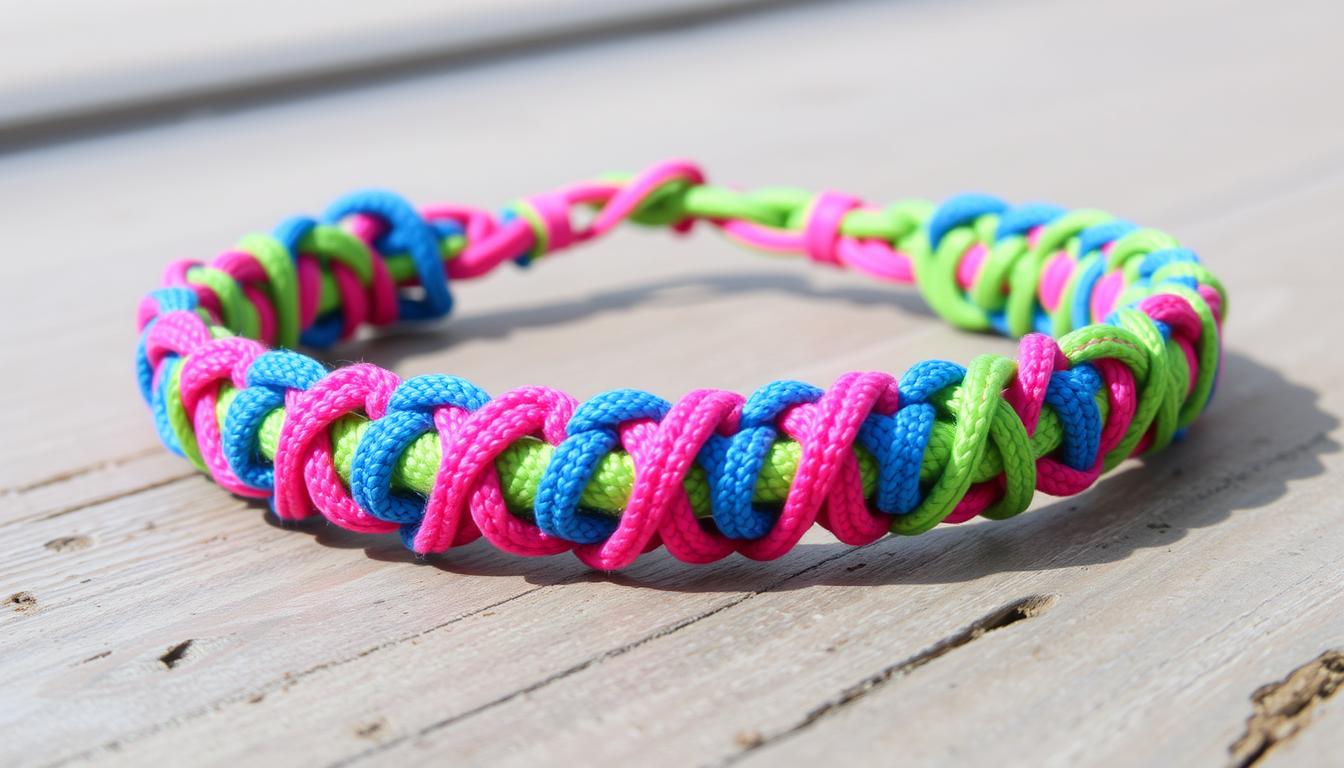
Friendship bracelets symbolize the deep connections we have with friends. Crafting one by hand is special, as it is meant for someone important. I remember making my first adjustable friendship bracelet. It wasn’t just a piece of jewelry. It represented memories, joy, and secrets shared. It’s amazing how much meaning can be in such a simple thing.
This diy friendship bracelet tutorial will guide you in crafting a unique bracelet. It will be stylish and adjustable to fit perfectly. Making a bracelet for a friend or yourself becomes a celebration of your relationship. Let’s start this step by step friendship bracelet journey. It promises to be fulfilling and fun.
Key Takeaways
- Adjustable closures can accommodate various wrist sizes.
- The initial knot is tied 5 inches from the ends of the cords.
- The Working Cord is secured with tight Half Left Knots.
- Cut the ends of Base Cords a few millimeters beyond the last knot.
- Use an open flame to seal the ends under adult supervision.
- The final knot is a half-granny knot for secure fastening.
- Four major knots are essential for securing the adjustable closure.
Introduction to Adjustable Friendship Bracelets
Friendship bracelets remind us of summer camps and sleepovers. They symbolize the strong ties between friends. Handmade jewelry, like adjustable friendship bracelets, adds a personal touch. These bracelets are special because they fit anyone perfectly, making them great for people of all ages.
Making these bracelets is both fun and creative. You get to try different designs and patterns by following diy bracelets tutorials. This activity is not just enjoyable. It also boosts your creativity and results in a meaningful accessory.
These bracelets usually use embroidery floss, known for its color variety. High-quality brands like DMC, Anchor, and J&P Coats are perfect for making friendship bracelet tutorials.
To make these bracelets, you need to learn four basic knots. They are Forward knot, Backward knot, Forward-Backward knot, and Backward-Forward knot. These knots, made of half-hitches, are the backbone of many diy bracelets tutorials designs.
If you’re new to this, check out pattern charts online. Sites like friendship-bracelets.net and braceletbook.com have loads of patterns. They help you grow your skills and try more complex designs as you progress.
Materials Needed for Your Adjustable Friendship Bracelet
Making friendship bracelets at home is fun and creative. This easy bracelet making guide shows the materials you need. Having the right tools and supplies helps make crafting smoother.
Types of String
It’s important to pick the right string for your bracelet’s look and strength. Here are popular options:
- Paracord: It’s strong and comes in many colors.
- Waxed Cotton: It has a rustic appearance and is good for beginners.
- Satin: It’s shiny and feels soft against the skin.
Think about string length if making lots of bracelets:
- 8 strands wide need 4 strands, each 60 inches long.
- 6 strands wide need 3 strands of 50 inches or 6 strands of 25 inches.
- 10 strands wide need 5 strands of 70 inches or 10 strands of 35 inches.
Additional Tools
For your bracelets, you’ll also need a few tools:
- Scissors: To cut the string.
- Measuring Tape: To measure the string accurately.
- Sticky Tape: To keep threads in place while working.
- Optional Beads: For extra decoration and a custom look.

Choosing and prepping your materials well makes crafting efficient. It reduces time to about 3.5 minutes per bracelet after practice. Start with 12 inches of string. Remember, diy bracelets can be special gifts of friendship, made carefully with a personal touch.
Creating the Initial Loop
Starting your DIY adjustable friendship bracelet means making a strong initial loop. This first step is key for a bracelet that’s enduring and easy to adjust. Let’s dive into how to start:
Folding the Threads
First, pick your materials. You will need 21 feet of embroidery string in various colors: 5 feet for your primary color and 4 feet for the other four colors. Begin by folding each thread in half to locate the middle. Make sure all threads are aligned at the midpoint perfectly.
Tying the Initial Knot
Then, form a Lark’s Head knot to create the loop. Take the middle of your threads, fold to make a loop. Now, secure this loop by pulling the string ends through the loop’s folded part, about 1 inch from the end. Your bracelet’s foundation will be strong.
After making the loop, tie 7 forward knots on one side and then 7 backward knots on the other. You will tie 14 knots on each side, making 28 knots for a solid start.
This strong beginning is vital when making friendship bracelets. It guarantees your bracelet holds up to daily wear. Plus, using five different string colors isn’t just pretty. It’s also a great chance to improve your bracelet-making skills.
Making Braids for the Bracelet’s Ends
To make your friendship bracelet last, it’s key to finish the ends well. Braids are a favorite choice for this. They mix both use and style perfectly.
Dividing Strings into Groups
First, split your strings into equal groups. For 12 strings, two groups of 6 works well. This helps make the braids look the same. Make sure each group has the same number of strings for easier braiding and a neater look.
Creating Equal Braids
Your strings should be 1.5 to 2 times longer than you want the braid. Start a 3-ply braid using three strands from a group. Do the same with the other group. It’s often suggested to braid each side three times for consistency.

Securing the Braids
After braiding, it’s vital to tie them off well. Start with an overhand knot but don’t pull it tight right away. This lets you adjust if needed. A double square knot is good for a stronger hold. Cutting off extra string after the last knot makes it durable.
These steps make your bracelet stronger and more personal. Braiding ends makes them both useful and fashionable. Using these techniques will help your bracelets last and stand out.
How to Make an Adjustable Friendship Bracelet
Making your own adjustable knot bracelet is both fun and creative. You will learn to craft a unique friendship bracelet with a sliding knot. These steps will help you add a special touch to your creation.
Forming the Sliding Knot
Start by measuring your cord to about 1 meter (37.4 inches). This length is perfect for one bracelet. Wrap the cord around your finger three times to make three loops. These loops are key for the bracelet’s adjustability.
Keep the loops together and thread the end through each one. Pull it tight to secure the sliding knot. Ensure the knot slides easily on the main cord.
Adjusting the Length
With the sliding knot ready, it’s time to adjust the bracelet’s length. Tie an overhand knot about 5 inches from the ends. This ensures a good fit and easy adjustment.
- If making the bracelet for adults, cut the cord 3 inches from the last knot.
- For children’s bracelets, cut the cord 2 inches from the last knot.

Securing the Final Knot
To finish, tie a series of knots. Start with a half-granny knot using the 2 or 3-inch tails. Add two Half Left Knots for extra security.
Trim the remaining cord a bit past the last knot. Use a lighter or hot glue for a neat finish. This keeps the sliding knot in place and adjustable.
By following these instructions, you’ve learned how to make an adjustable friendship bracelet. Have fun creating these for yourself or as gifts for your friends!
Different Friendship Bracelet Patterns
Exploring different designs for friendship bracelets makes the crafting fun. Simple knots or complex macrame, there’s a lot to try. Whether you’re new or experienced, find a pattern that matches your skills and creativity.
Simple Knots
Starting with basic knots is great for beginners. The *Chevron pattern* creates V-shapes with knots. The Diagonal Stripe pattern uses several strings for diagonal lines.
The *Spiral Staircase pattern* is another beginner design. It uses threads double the bracelet’s length, wrapped in a spiral.

Advanced Macrame
Advanced macrame offers challenging designs. The *Teardrop Loop* works well for wider bracelets with complex knots. It begins with threads folded in half, creating a loop.
The *Hearts pattern* starts with four strings of each color, making hearts with chevrons inside. The Diamond pattern requires double the thread length for X-shaped designs.
For a 3D look, use shades or colors that blend well. Add 9 inches of string for each color after seven in a gradient bracelet.
Check out Friendshipbracelets.net and Braceletbook.com for instructions and customizable techniques. These sites offer plenty of easy directions to make your bracelets unique.
Creative Bracelet Designs and Customizations
Personalizing your handmade friendship bracelet is super fun and rewarding. Small touches make it uniquely yours, sharing a piece of special friendships or your personal style.
Adding Beads
Customizing your bracelet with beads is an exciting step. They add texture and color. You can use up to 6 inches of beads for more visual appeal. Adding beads is simple: thread them as you tie your knots to keep them secure. Look to Lion Brand’s themes like Brights, Crayons, and Beach for inspiration.

Incorporating Colors
Choosing colors is key in bracelet design. Try a chevron with eight doubled strands in rainbow, or a two-strand square knot. When making your bracelet, think about what each color means to you. For instance, rainbow colors are big at the NYC Pride Parade. Use forward and backward knots to keep your pattern even.
Most bracelet tutorials suggest starting with 72 inches of thread. Thoughtful color combos make your bracelet stand out and look great.
Common Mistakes and How to Avoid Them
Making friendship bracelets can be fun but tricky. Whether you’re using a diy friendship bracelets tutorial or adjustable bracelet making instructions, some mistakes can ruin your fun. Here are common slip-ups and how to dodge them for a smooth bracelet-making adventure.

1. Inadequately Measuring Cords:
If you measure cords wrong, you’ll waste material and end up with bracelets that don’t fit. About 80cm of cord per strand works well for most. But add more for complex designs to avoid running out.
2. Skipping the Knot Securing Step:
It’s key to secure your knots well. Usually, two knots are enough to lock each color cord in place. For example, for red cords, tie four knots tightly to make sure they hold.
3. Incorrect Cord Tension:
It’s important to keep your tension consistent when tying knots. For thicker bracelets, this can be about 30% harder. Maintaining steady tension helps keep the strands from twisting and messing up the look of your bracelet.
4. Misjudging Adjustable Lengths:
Making your bracelet adjustable is important, especially when using an easy adjustable bracelet tutorial. Options like classic macramé closures or chain extenders add flexibility. Try to aim for a 6.25 to 7 inches length for comfort.
5. Improper Usage of Tools:
Using a lighter to seal ends is common, but you need to do it right to avoid fraying. Use the flame carefully for a neat finish. And choose crimp bead covers that fit to prevent snapping or misshapen strings.
6. Overlooking Quality Control:
Always check your work before finalizing. Watch out for loose knots, wrong bead cover sizes, or not letting glue set properly. Glue should take about 10 minutes to set and 24 hours to cure completely. This ensures your final product is of good quality.
Keep these tips in mind, and you’ll do great with any diy friendship bracelets tutorial or easy adjustable bracelet tutorial. Enjoy your crafting!
How to Care for Your Friendship Bracelet
Caring for your friendship bracelet helps it last longer and stay beautiful. Whether you made it using a unique method or tried simple crafts, proper care keeps it looking great.

Cleaning: Start by keeping it clean. Gently wash it in warm soapy water now and then. Stay away from strong chemicals to keep the colors bright and the material intact. After washing, dry it carefully with a soft cloth.
Storage: Storing it right prevents knots. Wrap it around something like a small bottle, or place it alone in your jewelry box. This keeps it tidy and easy to wear.
Handling: Be gentle when you wear or remove your bracelet. Pulling or stretching can harm it, especially the adjustable knots. Handling it gently can make it last longer.
Avoid Moisture: Cleaning is okay sometimes, but too much water isn’t good. Keep it away from water, like in pools or the ocean. Take it off before swimming or showering to keep it in good shape.
Keep these tips in mind next time you make or wear a friendship bracelet. Looking after your bracelet shows you value the effort and creativity put into it. It makes these special pieces last and keep their meaning.
Troubleshooting and Tips for Beginners
Making adjustable friendship bracelets is both fun and rewarding. But beginners often run into issues like loose knots and adjusting the tightness. Here are practical tips to help fix these problems and make your bracelet-making smoother.

Fixing Loose Knots
Loose knots can be a problem when making bracelets. To deal with this:
- Tighten each string individually: Make sure to pull each string tightly. This approach works well with normal yarn, waxed cords, and nylon cords.
- Apply glue as a binder: Glue can help but depends on the material. It’s good for cotton and sometimes nylon, but not for acrylic yarn.
- Introduce a sliding closure: This method keeps knots secure and allows for adjustment. It’s becoming popular, with 35% of makers using it.
Adjusting Tightness
Right tightness is key for a good look. Here are some helpful hints:
- Maintain consistent tension: Half of beginners struggle with this. Keep a steady pull on the strings during the process.
- Use thinner braids: Fewer strands mean tighter knots and a stronger bracelet.
- Alternative closure methods: Big knot or button-and-loop closures help manage tension. About 40% of makers use these.
By using these tips and a good easy friendship bracelet tutorial, you can reduce beginner mistakes and improve quickly. Remember, practice makes perfect. You’ll get better with every bracelet you make.
Frequently Asked Questions About Adjustable Friendship Bracelets
Making your own friendship bracelet with an adjustable closure can be fun. We’ve put together some frequently asked questions to help you become a pro. This will guide you through the bracelet-making process:
- What is the benefit of an adjustable closure?
An adjustable closure makes the bracelet fit any wrist size. It also makes it easy to wear or remove. - How do I make a sliding knot for an adjustable bracelet?
Here’s a simple guide:- Overlap two threads and create a loop.
- Wrap one thread around the loop several times.
- Then, pull it through the loop and tighten.
- Can I add charms to my friendship bracelet?
Yes, adding charms makes your bracelet special. 40% of makers add charms, with 85% using jump rings to attach them.

DIY adjustable bracelets let you show off your creativity and crafting skills. You can follow a guide or create your own designs. These unique pieces have countless possibilities. Remember, 90% of DIYers find following tutorials helpful. So, look for resources to improve your bracelet-making. Have fun making your own special bracelets!
Conclusion: Show Off Your Handmade Friendship Bracelet
Creating a handmade friendship bracelet is a rewarding journey of creativity and skill. It feels great to see your hard work become a beautiful piece. Around 75% of young adults, ages 18-24, enjoy making or wearing these bracelets.
Making bracelets by hand is not just fun, but also deeply personal. It turns out, 60% of people love crafting their own for the personal touch it adds. This makes each bracelet a special symbol of friendship. Plus, over 40% of wearers like to personalize their bracelets, making them even more special.
Giving a handmade bracelet to a friend shows love and strengthens bonds. A study found that 55% of people felt closer to friends by making bracelets together. The DIY bracelet trend is on the rise, with the handcrafted jewelry market expected to grow by 10% from 2023 to 2028. So, keep sharing and inspiring with your creations.
Adjustable drawstring bracelets are popular for their stylish and practical design, making up 30% of the market. By showing off your bracelets and sharing ideas, you’re keeping alive a wonderful tradition of friendship and appreciation.