One quiet Saturday morning, Emily decided to dive into DIY soap making. She was curious about making melt and pour soap after reading about it. She found many soap making tutorials online, showing a wide variety of creative ideas. Each tutorial showcased colorful and scented soaps. With her coffee and a list of what she needed, Emily was set to start a fun new hobby.
For beginners like Emily, making DIY soap at home is easy and enjoyable. The melt and pour method is simple, no chemistry degree required. It’s perfect for making personalized gifts, trying out a new hobby, or starting a small business. This guide will help you learn all you need to know.
You’ll start with the basics—what supplies and tools you need, and learn about different soap bases. Then, you’ll get into the fun part: choosing colors and scents. Making your own soap is satisfying and safe for beginners. You’ll be amazed at the beautiful soaps you can create.
Making soap can also become a way to earn money. Many people have started their own businesses selling unique homemade soaps. Are you ready to explore your creative side with DIY soap making? Let’s jump in!
Key Takeaways
- DIY soap making is accessible and fun, ideal for beginners.
- Melt and pour soap requires basic supplies and simple steps.
- Essential oils must be used within safe limits for a balanced aroma.
- Creative aspects like coloring and molding add a personal touch to homemade soaps.
- Soap making can be an entrepreneurial venture, creating unique products with market appeal.
Getting Started with DIY Melt and Pour Soap
Starting with DIY melt and pour soap is rewarding and fun. You don’t need lye, making it a safer choice. It’s perfect for beginners or anyone looking for an easy way to make soap.
First, choose a soap base. There are many kinds, like clear or white, and some have extras like shea butter or goat milk. These bases melt around 120ºF and shouldn’t get hotter than 160ºF to keep the texture right.
To begin, cut your soap base into 1-inch cubes for easy melting. Use something microwave-safe or a double boiler to melt them. Keep the temperature between 140-150ºF. This is the best range for adding scents and colors. You’ll usually add about 0.5 oz of fragrance oil for every 16 oz of soap base.
Melt and pour soap making is truly easy. After pouring the soap into molds, let it cool for 24 hours. Want it quicker? Put the mold in the fridge for up to 30 minutes. Once it’s cool, the soap is ready to use with no need to cure.
Melt and pour soap making lets you be super creative. You can choose from lots of molds, scents, colors, and extras. This guide makes it easy to start and encourages your creativity. Enjoy crafting!
Essential Supplies and Tools for Soap Crafting
Starting your soap making journey? Knowing the right supplies and tools is key. This is true whether you’re just beginning or already know your way around soap making. The proper equipment can greatly improve your experience in creating homemade soap.

Basic Soap Making Equipment
First things first, let’s cover the basics. Having these essential tools will make your soap making much smoother:
- Microwave: It’s used to melt the soap base, starting with 30-second bursts, then switching to 10 seconds.
- Chopping Board and Knife: Perfect for slicing the soap base into smaller pieces.
- Heatproof Bowl: Essential for melting your soap base in the microwave safely.
- Silicone Molds: They’re available in many shapes for shaping your soap bars.
Optional but Helpful Tools
Aside from the essentials, there are tools that can make your soap making easier and more efficient:
- Thermometers: They check that the soap base is the right temperature (about 130°F) for pouring.
- Microwave-Safe Pitchers: Great for melting and directly pouring the soap base into molds.
- Silicone Spatulas: These stir and mix ingredients well without scratching anything.
- Spray Bottle with Isopropyl Alcohol: This helps get rid of bubbles on the soap’s surface.
Using these tools properly can make your soap crafting go smoothly. While some tools are not a must, they can really improve your soap making. It’s all about making high-quality homemade soap.
Choosing the Right Soap Base for Your Project
Diving into DIY soap making means picking the right soap base is key. Your choice will shape the soap’s look, feel, and how it works with different skin types. Learning about various melt and pour soap base recipes helps you choose wisely.
Popular Types of Melt and Pour Soap Bases
Melt and pour soap bases are great for beginners because they are easy to use. Here are a few popular ones:
- Clear Glycerin Soap Base: Great for see-through soap designs and adding bright colors.
- White Opaque Soap Base: Best for solid, non-clear soaps, especially for detailed designs that need a solid background.
- Shea Butter Soap Base: Offers extra moisture, comes in liquid and solid forms.
How to Make Soap Base: What to Look For
Making a soap base goes beyond just melting. Think about using natural ingredients and the melting point. Here are tips:
- Natural Ingredients: Choose bases without artificial colors or smells. Brands like Nature’s Garden or Essential Depot are gentle on sensitive skin.
- Moisturizing Properties: Glycerin bases can be moisturizing but may dry out some skin types. Shea butter bases are better for moisture.
- Stability with Additives: Make sure your soap base works well with fragrances and colors. Some bases don’t mix well with added elements, which could ruin your soap.
Your decision greatly affects your soap, so think about these points when choosing a melt and pour soap base recipe. Follow the manufacturer’s advice to make sure your soap making goes smoothly, which will help make your soaps better and last longer.
How to Make Your Own Melt and Pour Soap: A Step-by-Step Guide
Making soap at home is fun and relaxing. Follow this easy guide to make your own beautiful, personalized soap. This melt and pour method makes the process simple.
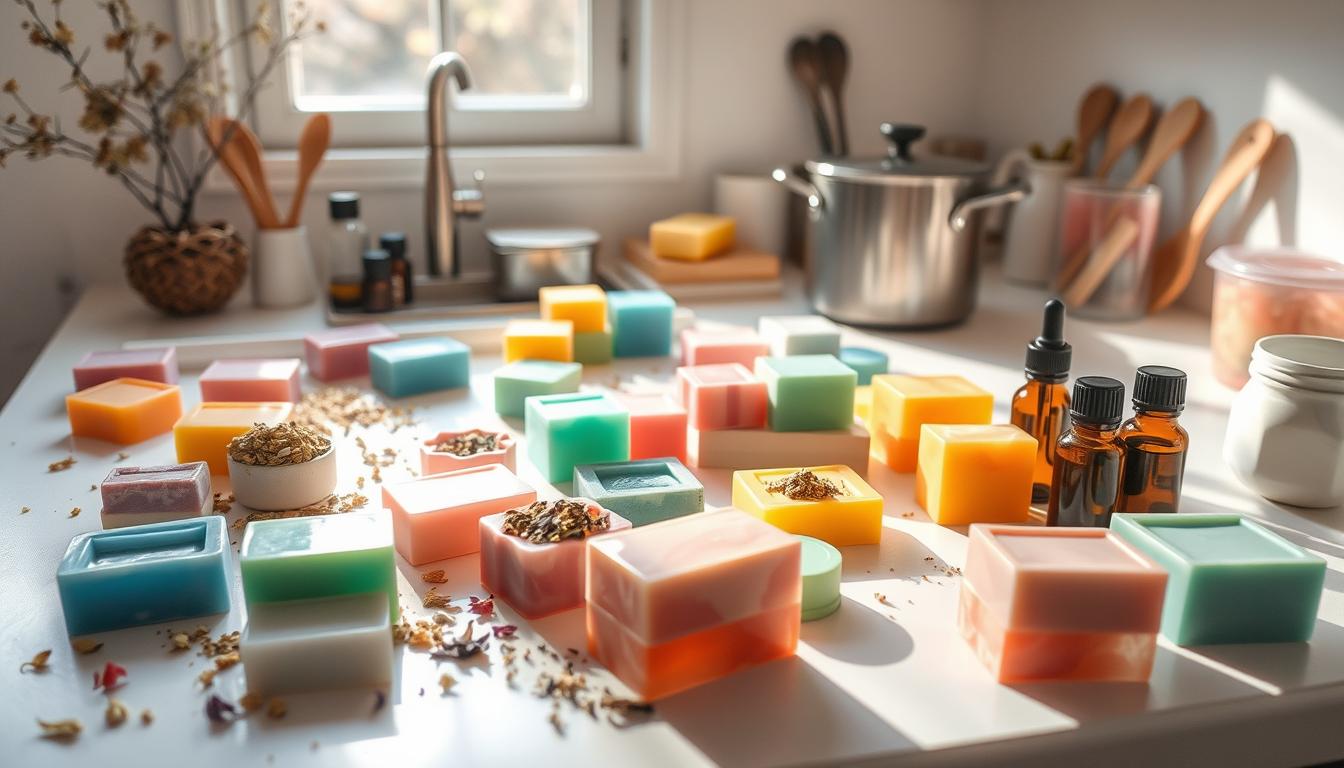
Preparing Your Workspace
First, clean and organize your workspace well. Make sure it’s dust-free and you have a stable, flat surface.
- Cover your working area with newspaper or butcher paper to simplify cleaning.
- Keep tools like measuring cups, mixing spoons, and soap molds close by.
- Keep a spray bottle with rubbing alcohol ready to fight soap bubbles.
Getting your workspace ready helps make your soap making smooth.
Cutting and Melting the Soap Base
Start by chopping the soap base into small cubes. This makes it melt faster and more evenly.
- Measure and chop enough soap base to fill your molds. For instance, a regular mold makes 6 bars, each around 5 ounces.
- Put the soap cubes into a container that’s safe for the microwave.
- Melt the soap in the microwave in 30-second intervals, stirring in between, until it’s completely melted. This usually takes about 4 minutes for 2 pounds of soap base, heating it to about 150°F.
Watch it closely to avoid overheating or boiling the soap base.
Adding Fragrance and Color

- With fragrance oils, start with 0.4 ounces per pound of soap base. For 2 pounds, you need 0.8 ounces. That’s about 2-3% of the soap’s total weight.
- For colorants, begin with 10 drops and adjust for the color you want. For example, mixing 10 drops of red and blue makes indigo.
Stir everything well but carefully to avoid bubbles. This ensures the color and scent spread out evenly.
Pouring the Soap into the Mold
Now that your soap base is ready with fragrance and color, pour it into molds.
- Gently pour the melted soap into molds, add any decorations or embeds you like.
- Use rubbing alcohol spray on the soap to remove any bubbles on the surface.
- Let the soap cool and harden at room temperature. You can also speed up the process by refrigerating it for about 1 hour.
When the soap is hard, carefully take it out of the mold. By following these steps, you will have a successful soap making experience.
Creative Melt and Pour Soap Recipe Ideas
Creating your own soap offers endless opportunities for unique designs. You can experiment with various scents, colors, and extras. This process turns your soap recipes into eye-catching works of art. Here are some fun ideas to inspire you.

Citrus Delight Soap: Wake up to the refreshing feel of this soap. Start with a clear glycerin base. Add fine slices of dried citrus, about 1/8 inch thick. Bake the slices for 2-3 hours at 200 degrees Fahrenheit. Mix in a few drops of orange essential oil, but keep the mix below 60 degrees Celsius when adding fragrance.
Chocolate Mint Soap: Treat your senses with this lavish soap. Use 4 lbs of creamy goat milk base. Mix in chocolate fragrance oil and peppermint essential oil. The scent ratio should be up to 3% of your total soap weight, or about 0.3 to 0.4 ounces per pound. This blend creates a rich and energizing aroma for any time.
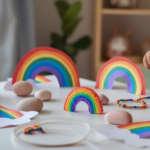
Layered Rainbow Soap: For an eye-catching look, make layers in different colors. Melt and cool each soap base layer before pouring. Make sure each color is solid before adding the next. This technique lets you play with colors however you like.
Oatmeal and Honey Soap: This soap is great for sensitive skin. Mix in finely ground oatmeal and a teaspoon of honey for each pound of base. Oatmeal soothes the skin, and honey moisturizes. Use a clear or white glycerin base. Heat the soap in 30-second bursts in the microwave, stirring in between.
Rose Petal Soap: For a sophisticated touch, add dried rose petals. Choose a clear glycerin soap base. Sprinkle petals evenly while pouring the soap. To boost the scent, add rose essential oil but keep the mix below 60 degrees Celsius.
These ideas are just the start of what you can do with melt and pour soap. This method allows you to make soaps that fit your taste. Whether you’re new or experienced in soap making, the most important thing is to experiment and enjoy the process. Discover your favorite combinations through trial and error.
Using and Measuring Fragrance Oils
When you make your next soap, knowing how to use and measure fragrance oils is key. These oils make your soap smell great and keep the scent just right. We’ll share some important handcrafted soap tips to help you mix and measure oils the right way.

Calculating the Right Amount
Measuring fragrance oils correctly is important. Too much or too little can ruin your soap’s scent. Always look at the IFRA Certificate for how much to use. For good scent in your soap, use about 0.5 oz (14 g) of oil for every 16 oz (454 g) of soap base.
Also, keep an eye on the soap’s temperature. Do not let it go over 160ºF (71.1ºC). The best temperature to add fragrance is between 140-150ºF (60-65.6ºC).
- Check IFRA Certificate for safe usage percentages.
- Measure 0.5 oz (14 g) of fragrance oil per 16 oz (454 g) of soap base.
- Maintain soap temperature between 140-150ºF (60-65.6ºC) when adding fragrance.
Tips for Blending Scents
Making a special smell means mixing different scents. Start with just a few drops. Try the scent before putting it in your soap base. A good amount is about 10 ml (0.33 oz) for every 1 lb of soap. Always use amounts that are safe for the skin.
Try mixing smells like floral, fruity, or spicy. But remember to keep each addition small. A good mix can make your soap extra nice.
- Begin with a few drops and test scent blends
- Use approx. 10 ml (0.33 oz) of fragrance per 1 lb of melted soap
- Stay within ‘skin safe’ percentages
- Mix floral, fruity, earthy, and spicy profiles cautiously
With these handcrafted soap tips, you’ll be set to measure and mix fragrances like an expert. Your homemade soap will make everyone happy with its wonderful scent.
Adding Color to Your Melt and Pour Soap
Adding vibrant colors to DIY melt and pour soap lets you make all sorts of fun designs. You can create everything from simple colors to complex swirls. Knowing the right colorants and how to use them is crucial for nice-looking soaps.
Types of Colorants
There are several coloring options for soap making. Some popular choices include:
- Micas: Fine powders that shimmer. They are perfect for shiny or metallic effects.
- Pigments: They create deep, bold colors. Best for making a statement.
- Dyes: Great for clear and bright colors. Make sure they’re meant for soap making.
Choosing the right colorant is important for skin safety. Always read labels and test in small amounts first.

Color Mixing Tips
Good color mixing can take your soap from simple to amazing. Here are some useful tips:
- Start Light: Use a little color at first, then add more if needed. This keeps the colors from getting too strong.
- Test Colors: Try mixing colorants in a little soap base first. This shows what the color will look like solid.
- Temperature Matters: Mix colorants at 140-150ºF (60-65.6°C). This temperature mix well without affecting the soap.
With these handmade soap making tips, you can create beautiful colors. This not only makes your soap look great but also fits personal tastes and styles.
Using Different Molds for Unique Shapes
Picking the best molds for your melt and pour soap is key to making beautiful soaps. You can choose from simple shapes to complex patterns. This choice can take your handcrafted soap to the next level.
Popular Mold Choices
When thinking about melt and pour soap, picking popular molds can boost your creations:
- Silicone Molds: Flexible and non-stick, making soap removal effortless.
- Plastic Molds: Affordable and available in various designs, though they require more care during soap extraction.
- Wooden Molds: Ideal for larger batches; line with parchment paper for easy removal.

Cleaning and Maintaining Molds
Keeping your molds in good shape is important. Here are some tips:
- Wash Immediately: Clean molds right after use with warm, soapy water.
- Avoid Harsh Scrubbing: Use a soft cloth or sponge to prevent damaging the mold surface.
- Storage: Store molds in a dry, cool place to maintain their shape and quality.
- Looking after your molds well is key. It helps your soap-making projects stay perfect every time.
Techniques for Layering Melt and Pour Soap
Learning how to layer melt and pour soap can make your homemade projects more impressive. By using some special tricks, you can easily achieve neat, clear layers. This guide will walk you through the steps to layer your soap and how to get it right each time.
Step-by-Step Layering Process
Begin with about 16 oz of soap base. Cut it into 1-inch cubes. This makes it melt uniformly and lets you add colors and scents without trouble. You’ll also need two 2-cup Pyrex cups for melting – one for each color you’re using.
- Melting the Soap Base: Melt the soap cubes in a microwave or double boiler, not letting them reach over 160ºF. Use Pyrex cups for best results. Heat in 20-second bursts, then in 5-10 second ones as needed.
- Adding Color and Fragrance: Put 3-4 drops of dye for each color layer and mix well. Keep the soap between 140-150ºF before adding any scent. For the scent, 0.5 oz is ideal.
- Pour the First Layer: Choose individual molds for the first layer instead of one big mold. Let it cool down to 130-140ºF.
- Spray with Isopropyl Alcohol: When a skin forms on the first layer, spray it with 99% isopropyl alcohol. This makes the next layer stick better.
- Pour the Subsequent Layers: Do the same steps of melting, coloring, and spraying for all layers. Make sure each has cooled to 130-140ºF before adding another. Avoid waiting over 90 minutes between layers to prevent them from separating.
- Final Cooling: Let the soap rest in molds for about a day. If a mold is tough, chilling it for 30 minutes might help get the soap out easier.

Tips for Perfect Layers
For flawless layers in your soap, remember these pointers:
- Temperature Control: Keep cooling layers at 130-140ºF and pouring layers at 120-125ºF. This stops the soap from hardening too soon and helps with a smooth pour.
- Use of Isopropyl Alcohol: Choose a spray bottle that gives a fine mist of 99% isopropyl alcohol. A little goes a long way in bonding layers without bubbles.
- Consistent Mixing: Always use a fresh stainless steel spoon for every color, to avoid mixing them up.
- Sanitizing Work Area: Keep your workspace clean with bleach and alcohol. This is very important when you’re making soaps with many layers.
- Patience: Give each layer enough time to cool down. If you rush, the layers might not stick together well, ruining the look.
By paying attention to these steps, you’ll make sure each soap layer is distinct and vibrant. This will truly show off your soap making talent.
Common Mistakes to Avoid in Melt and Pour Soap Making
Making soap is rewarding, yet it can be tricky. Even those who’ve made soap before might find problems without the right know-how. Whether it’s your first time or you’re looking to get better, steering clear of these usual errors will help a lot.

Overheating the Soap Base
Heating your soap too much is a big no-no. It can even ruin your fragrance, making it vanish. The key here is not letting the base get hotter than 120°F. Here’s how to keep it cool:
- Always check the temperature with a reliable thermometer.
- Heat it slowly and evenly, not in bursts.
- Add your scents when it’s cooler, ideally below 120°F, to keep their smells.
If your soap gets too hot, stuff you’ve mixed in might sink. This messes up the look of your soap.
Improper Mixing of Ingredients
Not mixing your soap right can make it lumpy or uneven. Here’s what to do:
- Stir your melted base gently to avoid air bubbles.
- Pour it carefully and use rubbing alcohol to pop any bubbles on top.
- Keep these tips in mind:
- Add plants as the soap starts to get cool; this keeps them looking nice.
- Don’t add too much butter or oil, or your soap won’t lather right.
These pointers help you make soap that’s smooth and looks good.
Being exact with how much you use and how long you wait is vital. Soap usually needs 6 hours to set in small molds, or up to 24 for bigger ones. Being patient and precise pays off with wonderful soap you made yourself.
Safety Tips for Soap Making at Home
Making soap at home should always be safe and fun. Here, we’ll share important tips for working with hot soap and keeping your area clean and well-aired.

Handling Hot Soap Safely
It’s key to be careful with hot soap, especially when using a melt and pour soap guide. Don’t heat your soap base over 160ºF (71.1°C) to avoid ruining its texture. And always wear latex gloves to protect your hands and keep things clean.
- Heat the soap base slowly, preferring a double boiler method if you can.
- Use an infrared thermometer to check the temperature often. Aim for 140-150ºF (60-65.6°C).
- If the soap sticks in the mold, chill it for a bit, up to 30 minutes.
Proper Ventilation and Cleanliness
Good airflow is key to steer clear of any soap-making fumes. Keep these tips in mind:
- Make soap in an airy space, near an open window or with a fan moving the air.
- Keep your working area tidy and free from anything that doesn’t belong.
- Line your surface with newspaper or parchment for an easy clean-up afterwards.
Stick to these safety steps to make melt and pour soap making both fun and safe.
Storing and Packaging Your Homemade Soap
After you’ve learned how to make soap, it’s important to store and package it right. This keeps your creative artisan soap in top shape. Proper methods stop glycerin dew and make your soap look better.
Preventing Glycerin Dew
Glycerin draws water from the air, which can leave water droplets on your soap. To avoid this, here are some tips:
- Wrap your soap right after it hardens, which is usually after 24 hours.
- Use plastic wrap that covers the soap well, like when wrapping a gift. This keeps out moisture.
- A heat gun can help make the plastic wrap fit tightly. This helps keep moisture out.
- Keep your wrapped soap in a place that’s cool and dry. This helps it last longer.
Creative Packaging Ideas
Beautiful packaging does more than protect your creative artisan soap. It adds value, whether for gifts or sale. Check out these ideas:
- Decorative bags or boxes make your soap look good for personal use, gifts, or sale.
- Adding a detailed ingredients label provides useful info to the user.
- Choose eco-friendly packaging to attract those who care about the environment.
Using these steps, your soaps will stay perfect and appealing. They’ll impress anyone who gets them.
Where to Find Melt and Pour Soap Supplies
It’s important to find quality supplies for soap making at home. You might be looking for soap bases, scents, molds, or coloring options. These are available both online and at local craft stores.
Online stores like Amazon and specific soap making sites offer everything you need. They have items for both newbies and seasoned makers. The Melt & Pour Soap Starter Kit, now at $54.66 from $60.74, is great for starters. It comes with 2 lbs each of Clear and White Melt & Pour Bases, a Basic Soap Mold, and tools like a spatula, knife, and more. This kit lets you make two soap loaves and is designed for first-timers.
Craft stores like Michaels and Joann Fabrics have various soap making supplies too. They carry soap bases, scents, molds, and dyes. Shopping in person lets you check out each item closely. Make sure to pick up both clear and white melt & pour bases for different projects. Keep the soap base below 160ºF (71.1°C) to avoid rubbery soap bars.
Don’t forget to grab some essentials before you start. You’ll need a spatula, knife, big bowl safe for the microwave, teaspoon, and a spray bottle with Isopropyl alcohol. Having these makes soap making at home easy and fun.