Imagine this: You’re sipping coffee one Saturday morning. You’re scrolling through Pinterest, and you find a glittering resin jewelry picture. You think, “Could I make that?” You’re not alone. Many crafters in the United States are trying resin crafting. It’s a hobby that lets people make everything from jewelry to home decor.
Resin crafting is becoming very popular, especially with beginners. It’s appealing because of the many projects, the easy mixing, and the custom colors and designs. It’s exciting to make unique gifts or items to sell. Making and curing resin brings a lot of joy.
In this guide, we will cover all you need to know to start with resin crafts. We’ll explain what resin is and how to make resin projects at home. You’ll have the knowledge and inspiration to start your own resin crafting adventure. Let’s make those Pinterest dreams come true!
Key Takeaways
- Epoxy resin has a typical mixing ratio of 1:1, favored for beginners due to its simplicity.
- Working time for resin after mixing is around 20-30 minutes before it starts to set.
- A recommended room temperature of 70-75°F ensures optimal curing conditions.
- Small castings and jewelry making are beginner-friendly projects.
- Using UV-resistant epoxy resin prevents jewelry from yellowing over time.
- Digital scales are recommended for accurate measuring, crucial for perfecting resin crafting.
- Resin’s full cure time is about 3-7 days, although demolding is possible after 24 hours.
- Variety of molds available, ranging from shapes for dominoes to license plate frames.
- Employing embellishments like dried flowers, glitter, and alcohol inks can elevate your creations.
Understanding Epoxy Resin and Its Uses
Epoxy resin is a strong polymer, great for crafting because it’s durable and looks clear. It’s perfect for all crafters, welcoming them to explore their creativity. Let’s explore why epoxy resin stands out in the DIY Resin Projects scene.
What is Epoxy Resin?
Epoxy resin is made of two parts: a resin and a hardener. Mixing them starts a chemical reaction, creating a hard substance. This hardening process can range from 12 to 24 hours initially, with full cure taking up to 10 days. The working time, or pot life, typically falls between 15 to 45 minutes.
Main Uses of Epoxy Resin in Crafts
Epoxy resin is beloved for its adaptability in crafts. It’s a favorite for both beginners and seasoned crafters. Projects include:
- Creating custom jewelry and accessories.
- Making intricate art pieces such as wall art and sculptures.
- Designing functional home decor items like coasters and furniture.
Selecting the right type of resin is key to your project’s success. Casting epoxies work well for large pours. Doming resins give a sleek, shiny finish to smaller items.
Safety Precautions When Working with Resin
Resin crafting is fun but safety is crucial. Here’s what you need to know about Resin Safety Tips:
- Ventilation: Work in a space with good air flow to avoid breathing in fumes.
- Protective Gear: Always wear gloves and safety glasses for protection.
- Temperature Control: Keep the temperature around the low 70s°F (21-23°C) for best curing.
- Mix Thoroughly: Mix the resin well to ensure it cures correctly.
- Avoid High Water Content: Don’t add items with a lot of water to your resin.
Use products that meet ASTM D-4236 standards for safety. A non-stick workspace helps with easy cleanup, making crafting enjoyable. Following these tips will make your Epoxy Resin Crafts For Beginners experience both safe and rewarding.
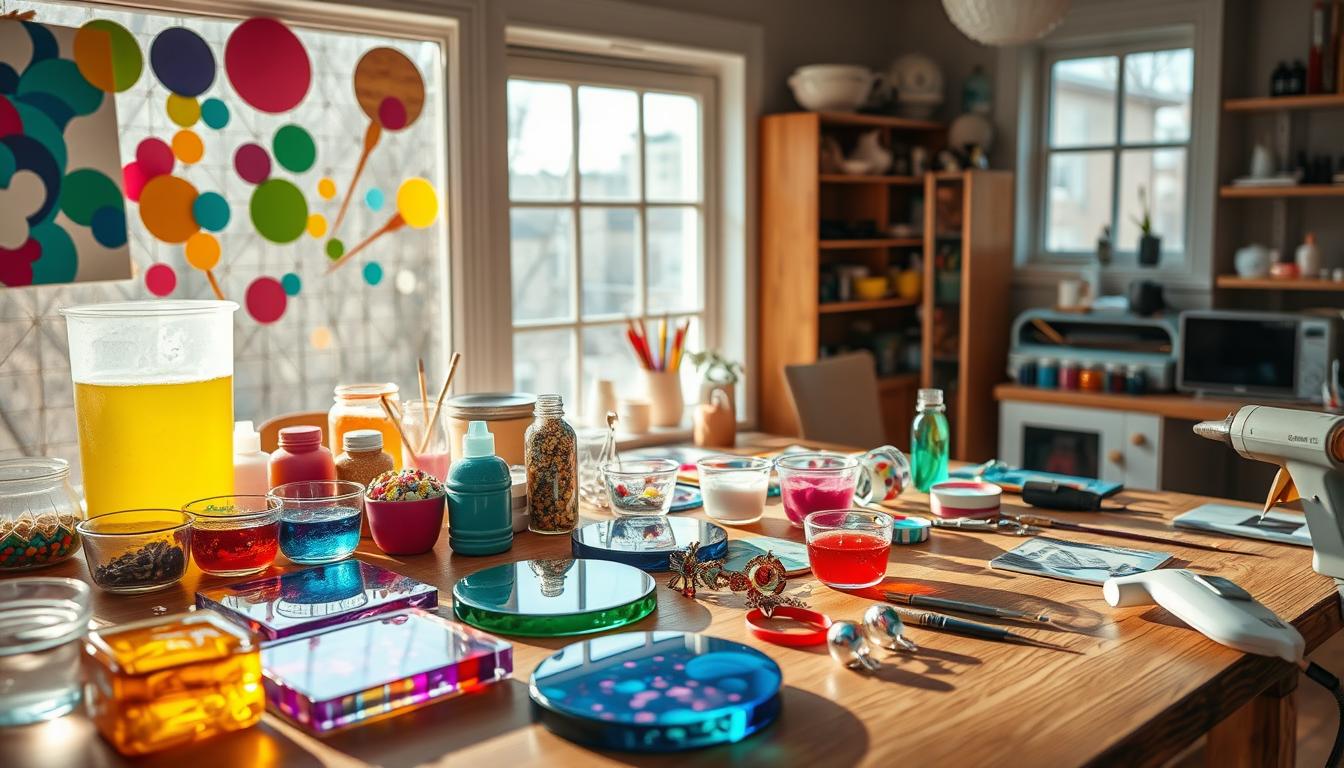
Essential Tools and Supplies for Resin Crafting
Starting your resin crafting journey? The right tools and supplies are must-haves. They’ll help whether you’re a beginner or want to get better at crafting. Let’s dive into what basic and advanced crafters need for outstanding projects.

Basic Tools for Beginners
Are you new to resin crafting? Starting with the basics is the way to go. Here’s a list of must-have Beginner Resin Tools:
- Epoxy Resin Kits: These kits come with resin, hardener, and how to mix them.
- Measuring Cups: They’re key for the right resin-to-hardener mix, ensuring it cures right.
- Disposable Gloves: Keeps your hands clean. Nitrile gloves are best for safety and allergy reasons.
- Flat Plastic Spreaders: They help spread resin evenly for a smooth look.
- Plastic Graduated Measuring Cup: For precise measurements and avoiding curing issues.
Optional Tools for Advanced Crafting
Ready to up your resin game? These advanced tools are great for mastering complex techniques:
- Heat Guns: Perfect for popping bubbles, giving a flawless finish.
- Pressure Pots: They remove bubbles in detailed molds for a pro look.
- Butane or Propane Torches: Best for bubble removal for a clear, smooth surface.
- Dust Covers: Use clean plastic containers to keep dust away while curing.
- Isopropyl Alcohol: Excellent for cleaning, ensuring your tools are residue-free.
Whether you’re starting out or perfecting advanced techniques, the right tools matter. Having your workspace ready with the needed Resin Crafting Tools improves both the process and the outcome of your projects.
Setting Up Your Resin Crafting Workspace
A well-organized, safe workspace is key to enjoying resin projects. Ensuring proper resin workspace setup and safety is crucial.
Choosing the Right Location
Picking a good spot is step one. It’s best in a well-ventilated area for fresh air flow. Open a window or use a fan to clear resin fumes, critical for keeping kids and pets safe.
Organizing Your Tools and Materials
Organizing your crafting space keeps things efficient and safe. Use shelves and drawers for storage. Have your tools and materials like resin within easy reach to keep things flowing smoothly.
Keep your workspace clear to avoid spills and ensure accurate measures. Nitrile gloves, silicone mats, and tools should be sorted to cut clutter and waste.
Maintaining a Safe Work Environment
Safety is top priority in a resin workshop. Wear nitrile gloves, goggles, and a respirator for protection, particularly when sanding. Use silicone mats for easy cleanup and to protect from spills. Also, clean your area from dust to avoid imperfections in your projects.
Tips for Mixing and Pouring Epoxy Resin
Starting with epoxy resin? Know the basics first. When mixing epoxy resin, mix it equally with the hardener. Make sure they blend well. First, mix in one container for about two minutes. Then, move it to another and keep mixing for two to four more minutes. This makes sure all parts mix well. Also, mixing at room temperatures in the low 70s (°F) is best. It helps make a clear and defect-free finish.
Not mixing well can cause problems, like cloudiness. To get a smooth finish, mix until there are no streaks. For adding colors, split the mixed resin into different containers. This makes the colors vibrant and even.

Bubbles are a common issue when mixing. Stir slowly to avoid them. If bubbles appear, use a heat gun or propane torch to remove them. But don’t overdo it, as this can add more bubbles, ruining the clarity.
Being careful and patient is important when pouring resin tips. Pour slowly to avoid making a mess. Most resins take 24 to 72 hours to harden. Fast Set resins harden in about four hours. Always check the instructions for the best outcome.
Keep your workspace clean. Silicone mats are great for easy cleanup. Don’t forget to cure the resin at the right temperature, between 24°C and 30°C, for a firm finish.
With these resin mixing techniques and pouring resin tips, you’ll be an epoxy resin expert in no time. Make beautiful pieces easily.
Popular Resin Craft Ideas for Beginners
If you’re new to resin crafting, start with easy projects to learn about the material. Projects like jewelry and coasters are perfect for newbies. They help you get used to working with resin and improve your skills.
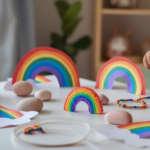
Resin Jewelry DIY
Starting with Resin Jewelry DIY is a fun way to dive into resin crafts. You can create your own pieces using molds. Add special touches with glitter, dried flowers, or charms. Here’s what you need to start:
- Epoxy or casting resin with a typical mixing ratio of 1:1 or 2:1, depending on the type of resin.
- Silicone molds designed for jewelry.
- Personal Protective Equipment (PPE) to ensure safety, including gloves and a mask.
- Mix-ins for embellishment like colorants, glitters, and flowers.
Be patient when mixing resin, as it takes hours to cure. After curing, you can make necklaces, earrings, and bracelets. This is a mix of art and skill.

Creating Resin Coasters
Making Resin Coasters DIY is another good project for starters. These coasters are both useful and decorative. Here’s how to start:
First, gather your materials:
- Resin with a suitable mixing ratio: a 1:1 ratio for art resin for better control, and a 2:1 for casting resin for deeper pours.
- Round or square silicone molds, available online or at craft stores.
- Colorants and embellishments like ink, paint, or glitter for a personal touch.
Make sure your resin mix is bubble-free. Pour it into molds in layers no thicker than 1/4″ (3 mm). Cure each layer fully before adding the next.
Making Resin Coasters DIY is fun and practical. You can make beautiful items for your home or gifts for others.
These Easy Resin Projects are great for starting your resin craft adventure. They offer a mix of simplicity and creativity. As you get better, you can try more challenging projects. But beginning with jewelry and coasters builds a strong foundation.
Common Mistakes and How to Avoid Them
Resin crafting is a fun and creative activity, but it’s not always easy. Many beginners face common mistakes. These mistakes can be avoided with some tips and planning. We’ll discuss measuring and mixing, and issues with curing and bubbles, to help you avoid these errors.
Measuring and Mixing Errors
Incorrect measuring and mixing of resin and hardener is a typical mistake. It’s important to keep a 1:1 mixing ratio for proper curing. Always use a measuring cup to get the right amounts of resin and hardener. Not doing this can lead to a finish that’s sticky or tacky.
“The number one reason for sticky resin is resin mixing problems,” resin experts frequently remind beginners.
Mixing the resin correctly is also key. Many beginners only mix for about 30 seconds, which isn’t enough. You should mix well for at least three minutes, making sure to scrape the sides and bottom of the cup at least three times. Mixing slowly is also a trick to reduce bubbles, which are common if you mix too fast.

Issues with Curing and Bubbles
Problems with curing and bubbles are common too. For curing issues, let your project cure for up to seventy-two hours, especially for layered pieces. Warm temperatures help speed up the curing process a bit. The best room temperature for curing is between 70-75 degrees Fahrenheit (20-24 degrees Celsius).
Bubbles can appear if you mix or pour the resin too fast. To lessen bubbles, pour gently and use a torch or heat gun right after you pour. Keep your work area level and clean to prevent surface issues and bubbles.
Natalie from ArtResin advises, “Ensure proper ventilation to avoid respiratory issues and always use safety gear like disposable gloves and goggles.”
By following these resin tips, you’ll avoid common mistakes. Always test with a small sample before starting your main project. This way, you get to see how the resin works. And don’t forget to clean your molds well after each use. This helps to avoid damage and makes future projects easier.
The Ultimate Guide to Resin Crafts: Tips, Tools, and Beginner Projects
The journey into resin crafting can be exciting but scary for newcomers. This Ultimate Resin Guide will give you all the important info you need. It includes tips, tools, and advice to become great at making resin crafts.
First, it’s key to understand epoxy resin, as the Beginner’s Guide to Resin explains. It’s great because it’s clear, tough, and easy to use, perfect for starters. Mixing it right is crucial. For instance, Epoke Mega Cast Resin needs a mix ratio of 100:60, but Epoke Quick Coat Resin uses 2:1.

Proper mixing and pouring are big topics in this guide. They help you steer clear of bubbles and issues with curing. Slow stirring and using a heat gun can greatly cut down bubbles. This makes the final piece look better.
Setting up a good workspace is also vital, as the Ultimate Resin Guide discusses. Make sure the area is well-aired to avoid breathing in fumes. Keeping your space neat helps you work better and more creatively.
Next, the guide talks about the must-have tools and supplies. You’ll need molds, cups for mixing, sticks for stirring, and heat guns. Also, wearing gloves and respirators is super important for your safety while working with resin.
It’s stressed a lot that using personal protective gear is a must-do. This keeps you safe and makes sure your projects turn out great.
To start, try making simple things like coasters or jewelry, the Beginner’s Guide to Resin suggests. These let you play with colors and decorations. And remember, patience is a virtue. Let your crafts cure fully to get the best finish.
“The potential for creating unique and one-of-a-kind pieces underscores the market’s shift towards personalized and custom-made artisanal products.”
Armed with this knowledge, you’re ready to begin your resin crafting journey. This guide is a great resource, whether for fun or business. Remember, every project is a chance to learn and get better.
Inspiration and Advanced Resin Craft Projects
Exploring advanced resin projects can be a fun challenge. These projects allow more creativity by using different materials. This opens up new possibilities and markets.
Creating Resin Artworks
Advanced projects include big resin artworks that stand out. You can use alcohol inks, mica powders, and various resins like EasyCast for unique effects. Events like Pinner’s showcase these techniques to many DIY fans.

Incorporating Different Materials
Adding materials like wood, metal, and fabric to resin makes your work unique. This approach leads to popular items like jewelry and coasters. Using glitter or dried flowers adds to the beauty. The right resin type is crucial for your project’s success.
DIY resin frames and ocean-themed art show the huge variety available. Fast Cast resin is great for quick projects. Try sprinkles or eco-friendly materials for something new. Always look for inspiration to improve your art.
Where to Buy Resin and Crafting Supplies
Starting your journey in resin crafting means finding the best supplies. Whether you’re new or have experience, knowing where to get supplies is key. Look at online shops like Resin Obsession and special craft stores for a wide range of products suitable for all project types.
If you need quality epoxy resin, ArtResin is a great pick. They offer anti-yellowing and fade-resistant options. Sizes vary from 16 oz to 10 gallons, making your work stay bright and strong. For those who care about the planet, the Eco Casting Resin Mini Starter kit is a good choice. It’s better for the environment.
Don’t forget, local hardware and art stores also have the resin tools you need. They’re perfect for quick buys. Joining online forums and craft communities is smart. You’ll learn where to buy the best resin and supplies. People share tips that help you find trusted sources. This makes your crafting safer and more enjoyable. Remember, clean and accurate tools are vital. If your resin is mixed wrong or dirty, your project might not cure right.