Imagine sitting by a campfire on a calm summer night. Around you, the soft crackle of fire tells age-old stories. It was during such times that dreamcatcher making began. These creations caught bad dreams in their webbed patterns. Now, making a dreamcatcher is a popular DIY project for everyone. Whether making a thoughtful gift or exploring your creativity, this guide will help you make a dreamcatcher easily.
Dreamcatcher sizes range from 5 to 10 inches. They use about 9 meters of artificial sinew for the web. Many Pinterest users have found this tutorial easy and effective. It suits anyone from kids to experienced crafters. Ready to start this magical craft of making a dreamcatcher? Let’s do it with modern style!
Key Takeaways
- Dreamcatcher hoops range from 5-10 inches, suitable for all crafting skill levels.
- About 9 meters of artificial sinew is ideal for weaving the web.
- Secure the string with 2-inch spaced loops to maintain the web’s integrity.
- Personalize your dreamcatcher with various feathers, beads, and gemstones.
- Enjoy the cultural significance and modern appeal of crafting your own dreamcatcher.
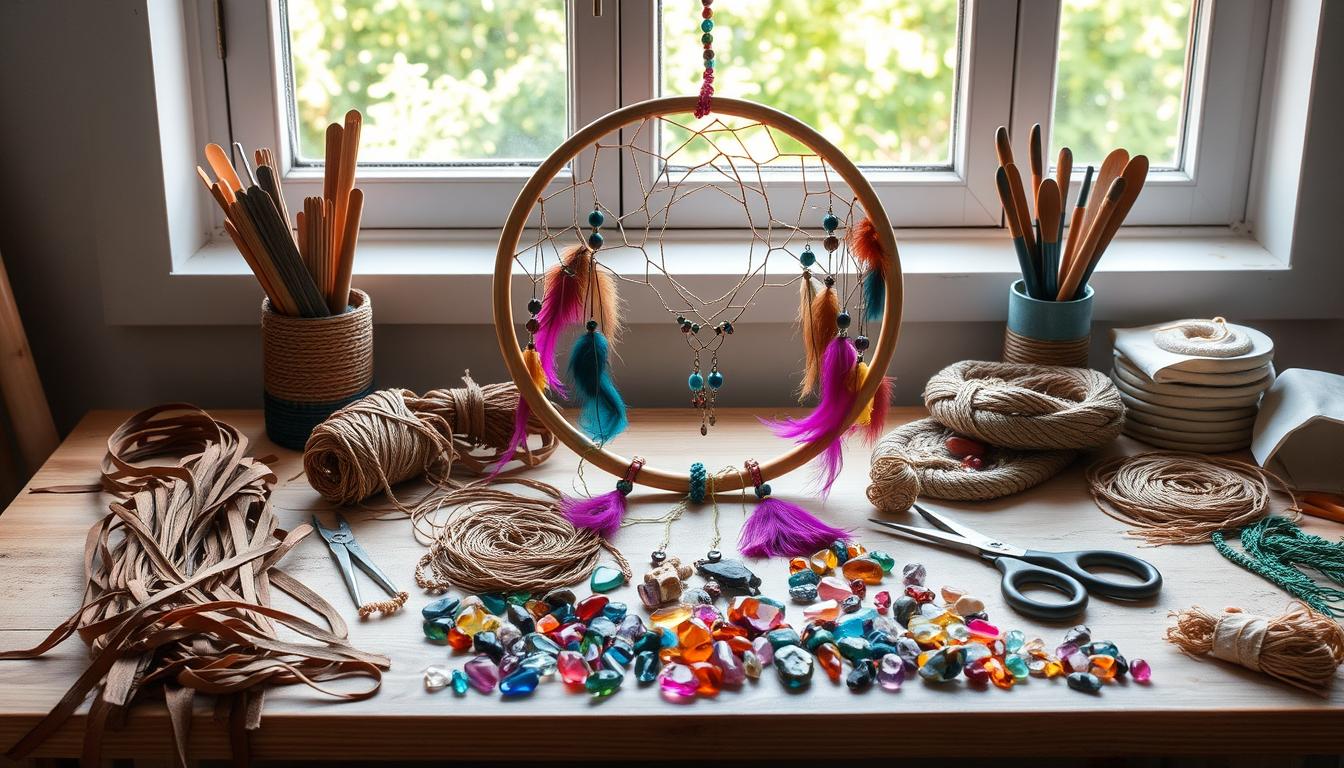
Materials Needed for Making a Dreamcatcher
First, gather all the materials you need for your dreamcatcher. Picking the right items not only eases the making process but also helps create a lasting and beautiful dreamcatcher.
Hoop Options: Metal, Wooden, or Embroidery
Choosing the right hoop is important. Beginners usually pick hoops that are 5 to 8 inches in diameter. You can select from metal, wooden, or embroidery hoops. Metal hoops are sleek, wooden ones add a rustic feel, and embroidery hoops are versatile and easy to find.
Choosing the Right Suede Lace or Ribbon
The lace or ribbon you choose wraps around the hoop and impacts the look and strength of your dreamcatcher. For a hoop of 5 inches, you’ll need about 2.5 yards of suede lace. The general rule is to have lace 18 times the hoop’s diameter.
Selecting the String for the Web
A strong, flexible string is key for a good web. Choices like artificial sinew or hemp cord work well. For a 5-inch hoop, use around 50 inches of string. Ensure you loop the string evenly, maintaining about 2 inches between loops for a uniform web.
Decorative Materials: Feathers, Beads, and More
Adding items like feathers and beads makes your dreamcatcher unique. Combine four to five feathers for a cohesive appearance. Using 4mm Amazonite beads or similar natural gemstones can make your dreamcatcher stand out. Be sure beads fit well in the web and trim feathers for a polished look.
When you’re learning how to make a dreamcatcher web and how to make a dreamcatcher with beads, the materials you choose are crucial. They significantly influence the final look and cultural importance of your dreamcatcher.
Preparing Your Workspace
Getting your Dream Catcher Weaving project area ready is key for a smooth crafting journey. First, get all your materials ready and make sure your workspace feels comfy and safe. This helps you dive deep into making a dreamcatcher.
Gather All Necessary Materials
Begin by collecting everything you need. You’ll want hoops (like rattan hoops around 21cm and craft rings about 8cm across), suede lace or ribbon, and string for the web. Don’t forget decorative pieces such as feathers and beads. Make sure you have 8 skeins of Perle 5 thread for fringe, each 80cm long. Having extra supplies gives you room for creativity and changes.
Setting Up a Comfortable Workspace
A good workspace makes a huge difference. Pick a spot with lots of light and comfy seating, as Dream Catcher Weaving needs detailed work. Keep materials close and organized to keep focused. It can be a craft room or a spot in your living room, just make sure it helps you concentrate and be creative.

Safety Precautions
When making dreamcatchers, always think of safety first. Handle scissors and needles carefully. Put away and cover them, especially if kids are near. Use a tiny amount of glue, less than 1 cm, to stick feathers. This prevents using too much. And, make sure your crafting area is airy to avoid breathing in glue fumes.
With your workspace ready, you’re set for a fun and smooth Dream Catcher Weaving adventure. Now, let’s start crafting those beautiful designs.
Wrapping the Hoop
To start making your dreamcatcher, first wrap the hoop. It’s best to use a 5-inch hoop. Choose suede lace or ribbon to wrap around it. This not only looks nice but also makes it last longer.
Using Suede Lace or Ribbon
Cut around 6 feet of suede lace to begin. Suede lace is great for beginners because it’s easy to handle. You will need an extra 2 to 3 feet of lace for decorations.
Secure Wrapping Techniques
Start wrapping at one spot and go around the hoop tightly. Use glue regularly to keep the lace from coming undone. This step is important for keeping your dreamcatcher together, especially during the next steps.
Make sure to space your wraps evenly and pull tight for a nice look.
Drying the Glue for Stability
After wrapping, wait for the glue to completely dry. This ensures everything stays in place. Hot glue works best for a strong hold. Wrapping your hoop will take some hours, so be patient.
How to Make a Dreamcatcher: A Step-by-Step Guide to Weaving Stunning Designs
Creating a dreamcatcher is both precise and fun. It’s crucial to learn how to make the web of a dreamcatcher. This part catches bad dreams but lets good dreams pass through.
To start, pick a hoop that feels right. A hoop that’s 5 to 8 inches across works well for newbies. You will need a string that’s ten times the hoop’s diameter. So, for a 5-inch hoop, you’d cut a 50-inch long string. Make sure you have all your supplies ready, like suede lace, string, beads, and feathers.
Keep the string wraps around the hoop even, about 2 inches apart. This makes the web stable. Start by tying the string tightly to the hoop, then wrap it to make even loops.

An effective Dream Catcher Weave Patterns DIY approach may include adding beads regularly or randomly, as you like.
Beads make the dreamcatcher look better and can mean something special. Many crafters put in personal items like special charms or crystals. These add charm to the dreamcatcher. When the web is done, tie off the end well so it stays put.
A 5-inch long loop at the top is for hanging the dreamcatcher. It should hang in balance. Attach groups of four or five feathers at the bottom for a real look. It’s not just about the steps, but also showing your creativity and style.
Learning how to make the web of a dreamcatcher and using thoughtful Dream Catcher Weave Patterns DIY methods lets you make amazing pieces. They are pretty and have deep cultural meanings.
Weaving the Web Inside the Hoop
Creating the web in your dreamcatcher hoop is both delicate and rewarding. To learn how to make a dreamcatcher web, start with the first layer. Then, you’ll add more layers for a beautiful finish.
Starting the First Layer of the Web
First, tie the string to the hoop’s top securely. This knot must be strong. Then, make the first layer of loops around the hoop. Space each loop evenly.
The number of loops usually varies from 10 to 14. This depends on your hoop size and design ideas.
Creating Evenly Spaced Loops
As you go around the hoop, pull the string to form loops spaced evenly. Aim for each loop to be 3-4 fingers wide. This forms your dreamcatcher’s basic structure.
A simple spiral dreamcatcher has 12 segments, each about 5 inches wide.
Weaving Multiple Layers
After finishing the first layer, start the second by looping the string through the existing loops’ center points. Repeat this step to add more layers.
After about 20 rows with one color, consider changing colors for a creative twist. This lets you try out different colors and patterns.

Securing the Final Knot
When happy with your web, tie the final knot tightly. This prevents the web from loosening. Tuck the thread’s end under some loops for stability and looks.
By carefully following these steps, you’ll create a how to make a dreamcatcher web that’s both stunning and strong. You can then decorate it with beads and feathers for a personal touch.
Adding Beads to the Dreamcatcher Web
Learning how to make a dreamcatcher with beads is exciting, especially when adding beads. These beads not only make it look better but also show your style. We’ll go over how to pick and add beads, making patterns that pop.
Choosing the Beads
Your first task in how to make a dreamcatcher with beads is to pick the right beads. You can choose from wooden, glass, bone, shell, or metal beads. Pick bead colors that look good with your other materials.
Incorporating Beads During the Weaving Process
Adding beads while you weave the web makes them part of the dreamcatcher. Put the beads on your needle and make loops at even distances. This way, the beads stay attached securely.
Creating Patterns with Beads
Make your dreamcatcher special by creating unique patterns with beads. You can change up the colors or sizes of the beads to make neat designs. You can use as many beads as you want, so be creative.

Decorating the Dreamcatcher
After weaving your dreamcatcher, it’s time for personal touches. Decorating one can be fun and meaningful. It lets you add symbols that mean something special.
Attaching Feathers
Feathers are often added to dreamcatchers. They mean a lot in many cultures. To add feathers, tie them with string or thread to the hoop’s bottom. Use feathers from birds like seagulls or peacocks for color and texture. Dreamcatchers usually have several feathers. They represent breath or air.
Using Fabric Strips for Decoration
Fabric strips are an easy way to decorate your dreamcatcher. Cut strips and tie them to the frame or bottom. Mix colors and textures for a nice look. Suede lace or ribbon makes it even prettier, adding a soft touch.
Adding Gemstones and Shells
Adding gemstones and shells gives a natural feel. You can tie them into the web or hang them from the bottom. Stones like amethyst or turquoise add healing vibes. Shells bring a beach feel. Make sure they’re well-placed to keep the dreamcatcher looking good.
Creativity shines when decorating your dreamcatcher. In learning how to make a dreamcatcher, remember these decorations aren’t just pretty. They carry stories, traditions, and personal meanings.
Making Specialized Dreamcatchers
Learning different ways to make dreamcatchers keeps cultural traditions alive and sparks new creativity. By using soft materials like yarn or skipping the hoop altogether, we can make dreamcatchers that are both unique and imaginative.
Dreamcatchers with Yarn
Creating a dreamcatcher with yarn is a warm and inventive option. Yarn lets you swap out traditional string for something softer and more colorful. It’s also a fun way for kids to build their hand skills and play with colors and textures.
Dreamcatchers with Beads
Adding beads brings intricate detail and sparkle to your dreamcatcher. You can choose from pony beads to wooden ones for colorful patterns. Arranging beads carefully makes your dreamcatcher not just a guardian charm but also a stunning art piece.

Dreamcatchers without a Hoop
Trying a dreamcatcher without a hoop offers a fresh take. You can weave on a round wood loom or use string over a frame. This version is great for diverse designs and easier for those with hand mobility issues.
November, being Native American Heritage month, is an ideal time to craft these special dreamcatchers. They add meaning to our crafts, whether for fun or education.
Dreamcatcher Weave Patterns DIY
Making Dream Catcher Weave Patterns DIY lets you bring your own style to traditional designs. You can pick a well-known pattern or make your own. This makes your dreamcatcher special.

Popular Weave Patterns
The traditional dream catcher design includes eight points, like a spider’s eight legs. This pattern carries deep meaning but is easy for beginners. The simpler 8-point pattern is easier to weave than the complex 12-point one.
Start with a 7-inch metal ring and choose yarn, macrame cord, or leather lace. These materials are versatile for any artistic style.
Each weave pattern adds its own meaning, such as the hoop symbolizing life’s cycle.
Creating Custom Patterns
Trying a custom Dream Catcher Weave Pattern DIY shows off your creativity. Use different connection points and add feathers, beads, and ribbons. Wrapping the hoop means tying knots, which lets you play with color and texture.
You can find materials at craft stores like Michaels or online on Amazon. This lets you experiment easily.
Dreamcatchers come from the Ojibwe tribe, adding tradition to the craft. Yet, you can use fabric strips or colorful ribbons, making your dreamcatcher unique. Creativity and skill combine, making a one-of-a-kind piece.
Traditional Versus Modern Dreamcatcher Techniques
Learning about dreamcatcher history shows us the value of old and new ways. The first dreamcatchers came from Native American culture, mainly the Ojibwe. They used things like willow rings and natural cords. Dreamcatchers were tools to sort dreams, letting good ones through and catching bad ones.

Old-school dreamcatchers were all about using what nature offers. The hoop, made of willow, stands for life’s circle. The web, with its eight sections, is like a spider—hence the Ojibwe name for dreamcatcher. Beads and feathers in these dreamcatchers mean different things:
- Red stands for life and energy
- Blue for calm and water
- Yellow means warmth and fresh starts
- Green is about growing and starting anew
- White for purity and clearness
- Black gives a sense of strength and safekeeping
- Purple links to wisdom and the soul
- Orange is all about creative energy
On the other hand, new dreamcatchers use a mix of materials. You’ll see metal hoops and artificial flowers and feathers. These choices let makers explore more styles and make dreamcatchers last longer. They’re also easier for everyone to get. Nowadays, people like making dreamcatchers that are more for decoration and fit modern homes.
Modern dreamcatchers often have hoops between 27cm to 36cm across. Creating one might need up to 2 meters of thread or lace. They’re usually decorated with 5-10 items like beads or feathers. This shows a person’s style and embraces mindfulness in decorating. Dreamcatcher kits have become 25% more popular, showing how much people enjoy this craft. You also see more flowers in these designs, making up 40% of recent trends. It’s a mix of beauty and spirit.
Making a dreamcatcher, whether with traditional or modern touches, is more than a hobby. It’s a way to show your creativity and link to a greater, spiritual history. Every bead, feather, and piece of thread in a dreamcatcher shares our wish to show who we are through things we make by hand.
Choosing the Right Size for Your Dreamcatcher
When picking the size of your dreamcatcher, think about what you’ll use it for and the space. You can choose from small, large, or travel-sized dreamcatchers. Each size has its own benefits and looks great.
Small Dreamcatchers
Small dreamcatchers fit well in small spots. They’re the size of rings on a lime juice bottle, around ½ inch or less. You can put them in your car or any small space. They’re made with things like paperclips, thread, superglue, and a needle. Even being small, they’re still detailed, with about 30 inches of string, three feathers, and little beads.
Large Dreamcatchers
Large dreamcatchers are great as the main decoration in a room. They’re often made with willow hoops and represent a rich culture and beauty. With more space, you can add lots of feathers, different beads, and even LED lights. These are best for big open areas. According to Native American beliefs, they catch bad dreams about 80% of the time.
Making a Travel-Sized Dreamcatcher

If you’re always moving, a travel-sized dreamcatcher can give you peace. They’re between the small and standard sizes, ideal for your suitcase or hotel rooms. You’ll need yarn or string that’s 30 inches long, a small ring, beads, and feathers. Use sharpies or fabric paint to make it colorful and unique.
Displaying Your Finished Dreamcatcher
After you’ve spent time and creativity on your dreamcatcher, knowing the best ways to show it off is key. This ensures it becomes a standout piece in your home, personal space, or car.
Best Places to Hang a Dreamcatcher
Choosing the right spots for your dreamcatcher is crucial. This can boost both its looks and its positive effects. People often choose the bedroom, placing it above the bed’s headboard. Dreamcatchers are thought to ward off nightmares here.
Also, the living room is a great choice for it to catch everyone’s attention as a stunning decoration.
Thinking about adding one to your car? That’s a great idea for both safety vibes and style. Just make sure it doesn’t block your view but can still move freely and show off its design.

Caring for Your Dreamcatcher
It’s vital to keep your dreamcatcher looking great. Dust it regularly with a feather duster or a soft brush. This keeps it clean. If it has feathers, gently fluff them to keep their shape.
Avoid direct sunlight to prevent fading colors. If it gets tangled, slowly untangle it to avoid breaking. With these care tips, your dreamcatcher will remain an eye-catching part of your decor for a long time.
Common Mistakes to Avoid
Making dream catchers is fun but some DIY Dream Catcher Mistakes can catch crafters off guard. Here’s what to watch out for and how to dodge these errors:
Using materials that are too heavy: Dream catchers should be light and floaty. Using heavy stuff can pull the hoop out of shape. Stick to light beads, feathers, and trinkets for the right balance.
- Poor knotting techniques: It’s important to tie your knots well. This keeps the web tight and in place. Try practicing knotting to get it perfect and stable.
- Symmetry issues during weaving: About 80% of makers struggle with keeping things even. Start by marking your hoop at even intervals to help with your weaving.
- Overloading with decorative elements: Adding too many decorations can make it look too busy. Pick a few special decorations to keep it looking neat and attractive.
- Neglecting balance: A dream catcher that’s not balanced will not hang right. Make sure to distribute the weight of decorations evenly around the hoop.
Patience and practice are your best friends in making dream catchers. Keeping these DIY Dream Catcher Mistakes in mind can help you make something both beautiful and full of meaning.
FAQs for Dreamcatcher Making
Many have questions about making dreamcatchers, especially if they are new to it. Knowing the answers to common questions will make your crafting better.
What size should my dreamcatcher be? You can make dreamcatchers in all sizes, from 2 inches to over 10 inches wide. Most beginners find it easier to start with a hoop that’s 5 to 8 inches across. You’ll need about 2.5 yards of suede lace to wrap a 5-inch hoop well.
What materials are best for making a dreamcatcher? It’s best to use natural materials for their “earthy energy.” Good choices are suede lace, ribbon, feathers, beads, and hot glue for the knots. Try using two types of feathers and 5 to 7 beads for each hanging part.
How long does it typically take to make a dreamcatcher? It might take a beginner 1-2 hours to make one. This includes the time it takes to learn. Also, let the glue dry for about 15 to 20 minutes after applying it. You’ll need to wrap the hoop 3-4 times to get it tight enough.
What are the recommended string lengths for the web and hanging loop? For a 5-inch hoop, use string that is 50 inches long. For the hanging loop, a 5-inch piece of suede lace works well. Make sure it’s attached tightly.
Making dreamcatchers is a form of art that needs creativity and patience. Answering these FAQs helps you avoid mistakes and create beautiful dreamcatchers. Whether it’s for their cultural value or to decorate, knowing how to make a dreamcatcher will improve your crafting skills.