One sunny Saturday afternoon, I found myself in a charming antique shop. I saw fascinating pressed flower frames. They were full of flowers pressed flat, telling stories of the past. They reminded me of my grandmother. She loved pressing flowers in thick books. Her way of saving garden beauty as keepsakes urged me to bring that charm into my home.
I fell in love with making pressed flower crafts. Making your home beautiful with DIY projects allows personal touches. Let’s see how you can make vintage frame projects that show off pressed flowers’ timeless beauty.
Key Takeaways
- Projects often use pre-cut acrylic sheets but can be customized.
- Four nuts and bolts, including wing nuts, create a flower-press aesthetic.
- Essential materials include acrylic sheets, nuts and bolts, and decorative chain.
- Drill holes 0.5 inches from edges for stability.
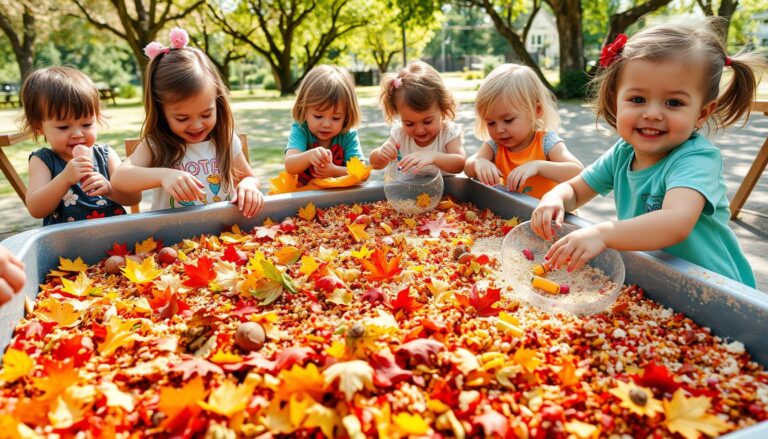
- Pressed flower frames can also display photos or children’s art.
- The finishing process includes polishing to remove fingerprints.
- Command strips are a versatile hanging solution for lightweight frames.
- Materials cost roughly $5, making it a budget-friendly project.
- DIY flower presses can be used year-round for various blooms.
Introduction to DIY Vintage Pressed Flower Picture Frames
Creating DIY vintage pressed flower picture frames is a charming way to save flower beauty. It brings a vintage feel to your home. This craft project lets you be creative and feel closer to nature. It turns fresh flowers into lasting art.
Pressed flowers have been a beloved art form since the 19th century, celebrated for their beauty and sentimental value. Many people have found joy in crafting pressed flowers, especially as at-home activities surged by 20% during the COVID-19 pandemic.
Making pressed flowers frames is easy, perfect for beginners. You only need $20 to $30 and about 30 minutes. This tutorial shows how to make a unique art piece easily and affordably.
Studies say 72% prefer handmade gifts like these frames over store-bought. In a survey, 88% valued custom gifts made from personal memories. This shows the deep meaning and beauty of making your gifts.
The DIY crafting world, especially DIY floral arrangements, is getting bigger. People want personal, meaningful decor. Making pressed flower frames is simple and doesn’t cost much. It’s great for those on a budget or looking for special gifts.
Gather Your Supplies
Start your journey to making beautiful vintage pressed flower frames by getting the right materials and tools. Having the correct supplies makes the crafting process smooth. Here’s what you’ll need to make your DIY project a hit.
Essential Materials
To start, gather the key supplies for your pressed flowers. These supplies include:
- Pressed Flowers: Pick from wildflowers or flowers that mean something to you, like those from a wedding or graduation.
- Pressing Books or Wooden Flower Presses: Perfect for pressing flowers the old-school way. The flowers will need to stay in press for 1 to 2 weeks.
- Frames: Opt for double glass frames or floating frames for best light and to beautifully show off your work.
- Archival Mounting Board or Card Stock: This helps your pressed flowers last longer. Go for neutral backgrounds like linen, watercolor paper, or handmade paper.
- Mod Podge or Archival Glue: Very important to keep flowers in place, especially in sunny spots to avoid UV damage.
- Matting: Adding a double mat for about $2 can give your artwork more depth and a fancy look.

Additional Tools
Now, you’ll also need these extra DIY tools to make your work easier:
- Scissors: For cutting stems and making petals the perfect size.
- Tweezers: For carefully handling the flowers without ripping them.
- Small Flat Paint Brush: This helps in spreading glue evenly without a mess.
- Microwave Pressing Tools (Optional): If you’re in a hurry, this method can dry flowers in minutes.
With these materials and tools, you’re ready to start your gorgeous pressed flower project. Using the right supplies not only makes your craft look better but also makes it last longer. Enjoy crafting!
Choosing the Right Flowers
Choosing the best flowers for your DIY projects makes a big difference. It’s important whether you’re crafting or just enjoying flower pressing. The key is to know which flowers work best.
Types of Flowers to Use
There are many great flowers to choose from for pressing. Some easy ones to start with are:
- Sweet Peas
- Pansies
- Love-in-the-mist
- Daisies
- Forget-me-not
- Roses
- Lily-of-the-valley
- Bluebells
- Muscari
- Larkspur
- Hydrangea
- Cosmos
Each flower brings something special to your crafts. For example, Pansies press well because they bloom for a long time. Forget-me-nots keep their blue color when dried. Muscari keeps its blue-purple color, even with its unique shape. Knowing these traits helps create stunning crafts.
Where to Source Your Flowers
Many places offer wildflowers or other blooms. Personal gardens are best for fresh, safe flowers. Florists can give you high-quality flowers too, just make sure they’re untreated. Look in local fields and public gardens after dry spells for wildflowers. Pick flowers on dry afternoons to avoid moisture. This knowledge helps bring a natural feel to your crafts.
Step-by-Step Guide to Pressing Flowers
Pressing flowers is a great way to keep their beauty for crafts and decor. You can choose between the classic method or quicker ways to press flowers. Here is everything you need to know to do it well.

Traditional Method
The classic way to press flowers uses a heavy book or a flower press. This method helps flowers keep their color and shape for several weeks.
- Gather materials: Pick a heavy book, some newspaper, and absorbent paper, like blotting or parchment paper.
- Prepare flowers: Use flowers that are nearly fully bloomed and dry. Flowers with single-layer petals, like daisies, are best.
- Arrange flowers: Put the flowers between layers of absorbent paper in the book, making sure they are flat.
- Press and wait: Shut the book and put more weight on it. Change the absorbent paper every 3 days to stop mold. It usually takes 2 to 4 weeks to dry. Keeping steady pressure is key for success.
Microwave Method
If you’re looking for a quicker option, the microwave technique is great. This method cuts down the time needed, making it faster and easier.
- Gather materials: You will need blotting paper, ceramic tiles, rubber bands, and a microwave.
- Prepare flowers: Pick fresh, dry flowers with single-layer petals. Stay away from thick-petaled flowers to avoid burning them.
- Assemble press: Stack the flowers between blotting paper layers and then between two ceramic tiles. Hold the tiles together with rubber bands.
- Microwave in bursts: Start with 25 seconds, then do 10-second bursts until the flowers are thin. Be careful not to burn them.
Choosing between the traditional method and the microwave method depends on what you prefer. Both ways will help you make beautiful, lasting floral art.
Creating the Perfect Arrangement
Designing the best look for your vintage pressed flower frames takes creativity, patience, and detail focus. Whether it’s your first time with pressed flowers or you’re experienced, use these tips to make your work shine.
Design Tips
Choosing the right background is vital. Scrapbook paper that is 8″ x 10″ is perfect. Using a thick mat helps keep the flowers from being crushed under the glass.
Variety in flowers brings texture and color. Favorite picks are hydrangea, daisies, and Queen Anne’s lace. Mixing in three kinds of ferns looks beautiful too. Start with four pink daisies, add three small flowers, and end with Queen Anne’s lace for depth.

For a modern style, spread out colors, especially yellow and white flowers. Before gluing, take a photo to check the balance of your arrangement.
Experiment with Layouts
Feel free to try different flower layouts. Place them on your paper without glue first. This lets you change things easily. Move the flowers around and try new groups until it looks good to you.
Try different papers for the background, even digital ones you can download. Use high-quality cardstock for a pro look. Keep your pressed flowers in plastic containers with dividers to stay organized.
When you arrange pressed flowers with care and explore different design ideas, you make art that truly stands out. The secret is being patient and playing with your materials to discover the best look.
Using Mod Podge to Secure Flowers
Using Mod Podge for crafts, like securing pressed flowers, requires some key tips for a perfect finish. It is a versatile adhesive and comes in forms like Gloss, Matte, Satin, and Hard Coat. This variety lets you pick the ideal finish for your craft.
To start, place your dried flowers on the frame’s backing to decide on the layout. After you are happy with the arrangement, get ready to use Mod Podge to fix the flowers in place. Carefully apply a thin Mod Podge layer where each flower will go. Remember to use a light touch with a thin brush to avoid damaging the petals.

Next, put a light Mod Podge layer over each flower to secure them further. Do this step gently. Although Mod Podge looks white at first, it dries clear for a clean finish. You may need 1 to 2 coats depending on your project.
It’s crucial to start with completely dry flowers to avoid mold or discoloration. You can dry them in a book for 1 to 2 weeks or use a microwave to speed it up. If microwaving, press them in a heavy book for a day beforehand to keep their shape.
Be careful not to use too much Mod Podge, as it can tear the flowers. A careful, sparing approach helps create a frame that highlights the beauty of pressed flowers. The right adhesive ensures your floral arrangements stay intact and look great.
Lastly, have fun with different flowers and frame styles. The variety and effectiveness of Mod Podge allow for unique creations. Enjoy the process and show off your floral artwork with pride!
Preparing the Frame
Before you show off your beautiful pressed flowers, make sure the frame looks great. We’ll talk about getting picture frames ready. This includes cleaning DIY frames and cutting the cardstock right, for a perfect look of your vintage-themed art.
Cleaning and Prepping
Start by picking a frame that makes your flower art pop. Thrift stores are great for finding cool frames for cheap. After picking one, clean it well. Make sure there’s no dirt or dust, especially on the inside glass. You don’t want any fingerprints or spots ruining the view.

To clean DIY frames well, mix vinegar with water. Use a soft cloth to gently wipe the glass so you don’t scratch it. For frames with lots of details, use a small brush to clean small spaces. A clean frame means your flowers will look their best.
Cutting the Cardstock
Now, it’s time to cut cardstock to fit your frame just right. First, measure your frame’s opening. Then, mark those sizes on your cardstock. Use a cutter or a crafting knife for clean cuts. The cardstock’s color and texture can really make your flowers pop.
Consider using textured scrapbook paper. It’s cheap, about 80 cents a sheet, and adds an interesting background. Make sure the cardstock fits perfectly in the frame. It shouldn’t bend. The right cardstock makes everything look put together and beautiful.
By doing these steps right, you make sure your DIY vintage pressed flower art looks amazing. It’ll be a beautiful and timeless piece that catches everyone’s eye.
Combining All Elements
Now that your flowers are pressed and ready, let’s start making your beautiful artwork. First, put your cardstock in the open frame. This cardstock will be the base for your flowers. Make sure it’s about 130 pounds to last a long time.
Then, arrange your dried flowers on the cardstock. You can try different layouts to see what looks best. Remember, pressed-flower pictures can last for many years if done right. Be patient and careful, placing each flower just so.
After you’ve placed your flowers, it’s time to use Mod Podge to keep them there. Brush a thin layer of Mod Podge over them gently. This step is vital to keep your flowers in place and protected for the future.

With your flowers glued down, seal up the frame next. When working on frames, it’s key to let each layer of paint or glue dry well. About 5-10 minutes should do. Up to 1-2 layers of gesso are usually enough for a good base.
Next, add the frame’s backing. Use two white round elastic cords to tie the press tightly, making sure it’s secure. This way, your artwork is not only lovely but also strong.
Finally, take a step back and look at what you’ve made. Creating DIY flower frames is not just about the beauty of flowers. It’s about combining art and practical skills. Share your unique creation with friends and family and enjoy.
The Importance of Drying and Sealing
To keep your DIY vintage pressed flower picture frames looking great, you need to dry and seal them right. This stops damage, like mold or fading. Stick to clear steps, and your flower art will last many years.

Drying Time
Drying flowers in frames is a key step. It usually takes 2 to 3 weeks for them to dry fully. This depends on how thick the petals are and how much water they hold. Thin-petaled flowers like cosmos and pansies dry faster because they soak up moisture quickly.
Make sure to pick flowers after the morning dew is gone. Also, press them between many sheets of paper that soak up water. Being patient here is important. If you hurry, the flowers might not dry completely and get damaged.
Sealing the Frame
Once your flowers are dry, it’s important to seal the frame to keep your art safe. Use glues or tapes to hold the flowers still. Then, use a clear varnish or a spray that protects against UV light. This step not only makes your flowers look better but also helps them last longer.
Consider a shadow box frame for extra style and protection from outside harm. This makes sure your pressed flowers stay in good shape for a long time.
Hanging and Displaying Your Art
After creating your DIY vintage pressed flower picture frame, it’s time to display it. This kind of art can make any space look better, like your living room, office, or a reading nook.
Here are tips to make your artwork pop:
- Use clusters of frames: Put multiple DIY frames together to make a gallery wall. Use different sizes and styles for a unified look.
- Highlight natural light: Place your frames where there’s a lot of light, like near windows. This will make the colors in your artwork pop.
- Integrate with other art pieces: Mix your pressed flower frames with other art or photos. This adds variety and makes your wall decor more interesting.
And, to keep your artwork as the main attraction, try these tips:
- Secure hanging tools: Pick strong hooks, nails, or adhesive strips for your frames. They’ll stay up longer this way.
- Consider the height: Hang frames at eye level so they’re easy to see. If hanging many, align them in the center for balance.
- Rotate displays: Move your frames around once in a while. It freshens up your decor and highlights different spots in your home.
Showing off pressed flower art brings your creative work into the spotlight. It makes your space feel more personal. With these suggestions, you can celebrate the beauty of your pressed flowers and make any room feel better.
Inspiration from the Past: Vintage Style
Drawing inspiration from the past is rewarding and nostalgic. Vintage style crafts add timeless beauty to any project. Using pressed flower frames showcases nature’s intricate beauty, like in historic décor.

Flowers fade gently over time, reducing their color vibrancy by about 20%-30%. This fading adds vintage elegance to your home. For example, white flowers often turn beige, showing a 10%-15% color shift, which enhances the antique look.
Pressed flower art holds dear memories too. A single flower-picking trip can bring in 10-20 flowers. Over a summer, you’ll collect 30-60 flowers, preserving cherished times.
In 2023, DIY home decor projects became 15% more popular than in 2022. Botanical prints and stationery are expected to rise 25% in popularity by 2024. This shows people love making and displaying nature-inspired decor. Social media platforms focusing on DIY crafts have also seen a 40% increase in user engagement since 2022.
Authentic antique herbarium sheets are treasures online, fetching high prices on sites like Chairish and eBay. These collections add value to your vintage decor. Making pressed flower art preserves history and botanical beauty for others to enjoy.
Preserving Memories with Pressed Flowers
Pressed flower frames are a beautiful way to hold onto cherished memories. They turn everyday flowers into lasting keepsakes, whether for special events, travels, or precious moments. They offer a special way to remember the past.
Since 2019, many people have worked with us to enjoy preserved flowers as fine art. These pieces fit well with different home styles. Our collection features nine unique vintage frames, each crafted for elegance and emotional value.

Our top seller, the 16×20 frame at $495.00, is widely loved for its timeless design. Meanwhile, the 18×24 frame, at $635.00, is the “Most Recommended” for making a statement. We offer frames in wood, metal, and glass to match all tastes.
Our frames, like the 8×10 and 11×14, start at around $395.00. Customizing your space is easy with our ready-to-use or DIY frame options. For those watching their budget, accessories like the birth flower necklace, from $49.50, add a personal touch.
Our frames do more than just preserve flowers. They come with glass that blocks 99% of UV light, keeping your memories bright for years. Also, our “BUY 2, GET ONE 50% OFF” deal helps you decorate your walls with memories.
We aim to help people nationwide keep their flowers forever. Frames range from $145.00 to $785.00, creating a timeless bond with special moments. From a $84.95 floral necklace to a $185.00 custom piece, our checkout process includes clear shipping for ease.
Join our 776 happy customers in cherishing your flower craft projects. Let us help you turn flowers into art that touches your heart.
Gift Ideas with DIY Vintage Pressed Flower Picture Frames
Pressed flower gifts are a unique way to show you care. For anniversaries, try making a frame with flowers from the wedding bouquet. Use flowers like lavender, daisies, and violets to capture those special moments. Wedding presents can be special too with framed flowers that match the wedding theme, making a lasting keepsake.
For birthdays, picking the right background paper shows you put thought into it. You can pick from four beautiful designs online, printed on high-quality paper. Putting in someone’s favorite flowers, like pansies or marigolds, adds a personal touch. You can also add little decorations to make the gift even more special.
Pressed flower frames are great for many occasions and make lovely home decorations. The trend of pressed flower crafts is growing, offering a unique gift option. The effort and love put into making these frames are what make them stand out. Whether it’s for a wedding, anniversary, or birthday, a pressed flower frame is a gift that lasts.