Imagine making resin jewelry in a cozy room filled with tiny dried flowers and sparkling colors. The moment you pour clear resin into a mold is thrilling. You’re waiting for it to transform. This craft mixes art and science beautifully, letting you be super creative.
Resin jewelry is more popular now because it’s so versatile and beautiful. You can make pieces that keep special memories alive or show off incredible style. Whether you use dried leaves, bright colors, or shiny gold flakes, this guide will help you make your own fabulous jewelry.
Key Takeaways
- Resin is favored for its ability to showcase natural elements and achieve a crystal-clear finish.
- Dried flowers and leaves are popular inclusions in 48% of resin jewelry designs.
- Layering colored resin can create depth and enhance visual appeal, a technique used by 60% of crafters.
- Two-part epoxy resin is preferred by 70% of users for its durability.
- Approximately 40 ml of resin can yield multiple pieces of jewelry, such as pendants, bracelets, and earrings.
Now, let’s explore the wonderful world of making resin jewelry. Here, your amazing ideas become beautiful pieces of jewelry you can wear.
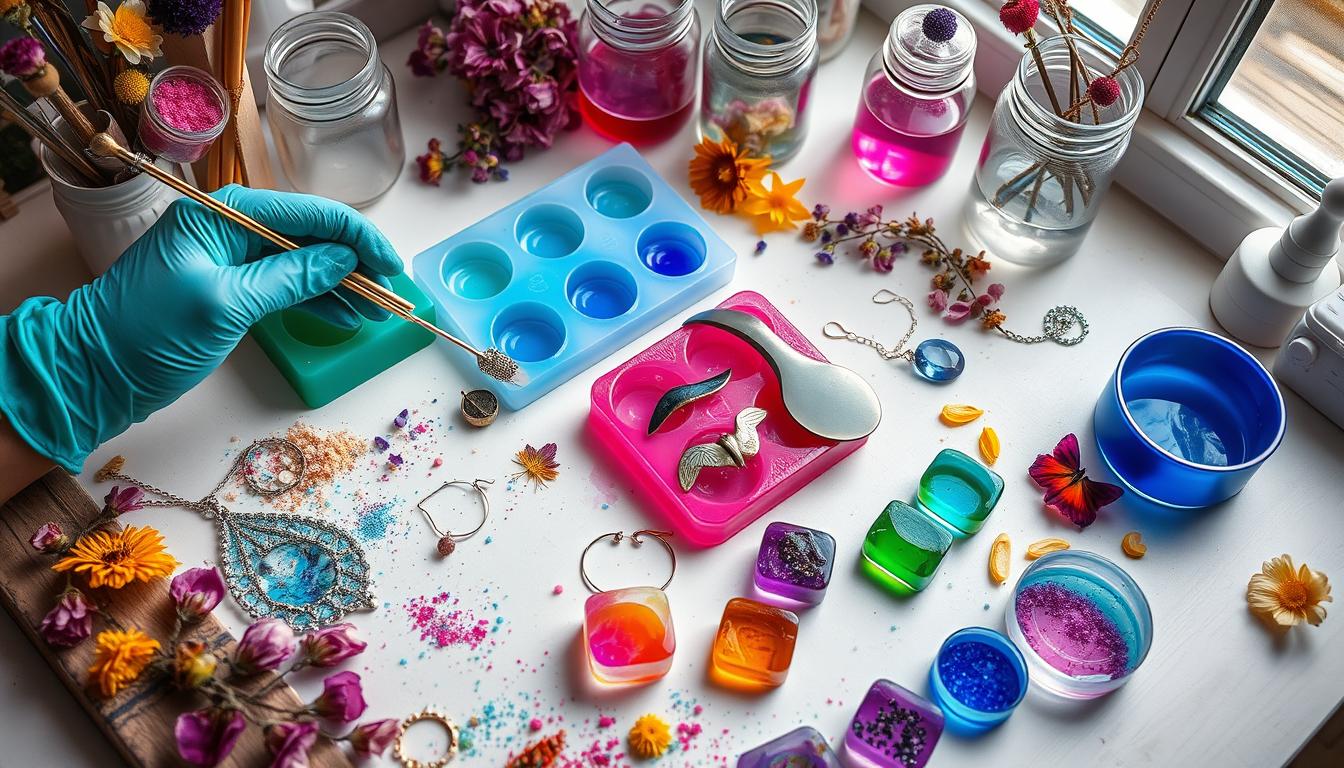
Essential Supplies for Resin Jewelry DIY
Creating beautiful resin jewelry starts by picking the right supplies. Here are the essentials you need to begin your Resin Crafts Tutorial.
Choosing the Right Resin
Selecting the proper resin is key. We recommend two-part epoxy resin, like UltraClear Art & Craft Epoxy or UltraClear Deep Pour Epoxy, for its safety and durability. This resin is easy to use and gives a high-quality finish, perfect for your jewelry projects.
Tools You’ll Need
To make amazing pieces, you’ll need some key tools:
- Small mixing containers with volume measurements
- Silicone stir sticks or small mixing spoons
- Molds or open bezels
- Health protection gear, including gloves and safety glasses
- Heat gun or propane torch to eliminate air bubbles
About 70% of DIY resin jewelry creators prefer using open bezels since they’re easy to use and remove after curing. Plus, more than 60% of hobbyists like silicone molds because they’re great for detailed designs and simpler to use than other molds.
Additional Items to Enhance Your Jewelry
To make your creations even more unique, think about adding:
- Resin dyes and pigments for bright colors
- Decorative items like shells, pressed flowers, or metal flakes
- UV Gel Nail Polish for added detail and shine
Interestingly, 75% of searches related to resin jewelry are for pressed flower designs, showing it’s a popular trend. With dyes and pigments made for resin and special items like Pearl Ex powdered pigments, you can customize endlessly.
Having all these essential supplies and tools means you’re ready to start a Resin Crafts Tutorial. You can make beautiful, unique jewelry at home.
Setting Up Your Resin Jewelry Workspace
Creating beautiful resin jewelry starts with a well-set workspace. It’s important for both beginners and pros. Here’s how:
Proper Ventilation and Safety Gear
Working with resin needs good air flow. Keep your workspace airy, at 75°F to 80°F, perfect for resin to set. Use an exhaust fan or open windows to keep air moving.
Staying safe is key. Always use gloves to keep resin off your skin. Wearing an N95 mask and safety glasses protects you from fumes and splashes, especially when pouring resin into molds.
Organizing Your Tools and Materials
Keep your space tidy for easier crafting. Set up all your tools and supplies neatly before starting. Put everything in containers or trays for quick access.

Protect your table with painter’s plastic against spills. Have your pliers, loop gadget, and drill ready for use. This prep saves time and makes making jewelry smoother.
Having a well-aired, tidy space with the right safety gear ensures a good crafting time. With all tools within reach, your Resin Jewelry DIY will be both smooth and fun.
Mixing Your Resin: Tips and Techniques
Getting your resin mix right is key for stunning, bubble-free jewelry. We’ll explore some vital Resin Tips and DIY Epoxy strategies for your art projects.
Measuring Resin and Hardener
Correctly measuring resin and hardener ensures it sets right. It’s key to follow the ratios your resin brand suggests. These ratios are often 1:1 or 2:1. Accuracy in measuring leads to the best curing and finish.
Stirring Techniques to Avoid Bubbles
Bubbles are a common problem but you can avoid them. Stir your resin mix slowly and with purpose for 3 to 5 minutes. This helps lessen bubbles.
To get rid of any bubbles after pouring, use a heat gun or torch. You may need to apply heat a few times since bubbles might keep showing up.
Adding Color and Texture
Add colors with dyes or powder pigments for unique looks. Mix in glitter, sand, or fibers to make your jewelry pop. Start by filling molds halfway with resin before adding these elements. This prevents overflow and ensures items are set well.
Adding things like sprinkles can make your pieces stand out. While there’s no perfect ratio, try for 20-30% fillers by volume of your resin for great results.
These Resin Tips help in measuring, stirring, and customizing your jewelry. Practice these steps to perfect your craft and create amazing pieces.
Pouring Resin Into Molds
Pouring resin into molds is a key step in Resin Jewelry DIY. It requires careful attention and the right tools. When you choose the right molds and use the best techniques, you can make stunning and one-of-a-kind jewelry. Whether it’s a simple pendant or something more complex, these tips will make your work better.

Choosing the Right Mold
Choose molds that fit what you want to make for the best results. Silicone molds are popular because they’re flexible and easy to remove your piece from. A good choice is a silicone coaster mold because it’s reusable and strong. Your mold should be at least 7 inches square and 1/4 inch deep, so it fits different designs.
Layering Resin for Depth
To add depth to your resin jewelry, pour the resin in parts. Wait for each layer to partially set before adding the next one. It usually takes about 24 hours to fully cure each layer. This method makes your piece look deeper and richer. It also helps to achieve a smooth finish with fewer bubbles.
Embedding Objects for Unique Designs
Adding objects like flowers or beads to your resin makes it personal. Place these carefully in the mold before adding more resin. Keep the mix of resin and hardener equal for the best outcome. Crafters sometimes use Ink Sinkers to make the colors look deeper.
You should sand the piece for at least 40 minutes after it cures. Start with 80-grit sandpaper and go up to 2000. Wet sanding is best for the finer grits. This careful sanding makes sure your piece has a smooth, professional look. It’s a crucial step in making sure your project turns out great.
Using UV Gel Nail Polish with Resin Jewelry
Using UV Gel Nail Polish in resin jewelry brings bright colors and fast drying. It’s getting popular because it makes detailed designs easy.

Putting UV Gel Nail Polish into or on top of unset resin makes great effects. It cuts the need for colored resin by a lot. This saves materials and offers more color choices.
Adding UV gel polish into resin molds is now a common practice in jewelry making. A project usually needs many layers to look deep. Crafters often use three to four layers.
UV Gel Nail Polish makes resin jewelry look elegant and professional. Each polish layer dries fast under a UV nail lamp. It takes about 2-3 minutes to set. This lets you finish more work quickly.
These methods give a polished look and rarely cause colors to bleed. For strong bonding, use a 5-minute epoxy glue. Also, fine tools help in detailed work, improving the final look.
To make your work look pro, add flatback Swarovski crystals. They’re known for their quality and shine. Whether you’re a newbie or an expert, UV Gel Nail Polish can make your jewelry stand out. With the right tools and patience, your designs will look beautiful and complex.
Step-by-Step Tutorial: How to Create Stunning Resin Jewelry
Making stunning resin jewelry is fun, blending creativity with a bit of science. You can make beautiful pieces safely with this Resin Crafts Tutorial.
1. Gathering Your Supplies: You will need epoxy resin, hardener, molds, and mixing tools. Add color and texture with mica, glitter, or dried flowers. An 8 oz. kit, which costs about $20, makes several jewelry pieces.
2. Setting Up Your Workspace: Make sure the area is well-ventilated and you have your safety gear on. Keep your supplies organized. You’ll spend around 15 minutes preparing to create a resin pendant.

3. Mixing Your Resin: Use a 1:1 mix of resin and hardener for the best mix. Measure carefully and mix gently to prevent bubbles. You can make many items from 40 ml of resin, including pendants and earrings. Adding too much color can affect the resin, so keep it under 6%.
4. Pouring Resin Into Molds: Choose the right molds for your project. For thick pieces, use deep pour resin. You can layer resin or embed objects for interesting effects. Each piece is a unique creation.
5. Curing Times: It takes 12-18 hours to dry but 24 hours to harden completely. It fully cures in 72 hours. Being smart with your resin can save materials and money, just like reusing wrapping paper in your designs.
6. Final Touches: You may need to polish your jewelry to fix scratches. Resin is strong, but deep marks might need special care. Mod Podge Resin is known for keeping colors bright for a long time.
Following this guide, you can become great at making resin jewelry. This Resin Crafts Tutorial guides you to create safely and efficiently. Enjoy your crafting!
Creative Resin Crafts Ideas and Inspiration
Exploring your creative side with resin crafts is both fun and rewarding. You can play with different themes, colors, and special additions to make your craft unique. These ideas are great whether you’re just starting or have been crafting for a while.
Themed Jewelry Concepts
Themed jewelry lets you create pieces that are not only trendy but also full of meaning. You might explore themes like:
- Nautical: Use seashells, sand, and blue colors for a beach look.
- Botanical: Include dried flowers, leaves, and green colors to bring nature into your designs.
- Celestial: Mix in stars, moons, and galaxy patterns for a space theme.

These ideas connect with various interests and are great for sparking conversations. They’re also perfect gifts for special days like Galentine’s Day.
Mixing and Matching Colors
Getting the right color mix is key for eye-catching crafts. Here are a few tips:
- Start with a color palette: Pick colors that look good together. Favorites include soft pastels, bold ombre shades, and simple blacks and whites.
- Test different ratios: Try mixing small amounts of resin with colors to get the tone you want.
- Layering: Add depth by pouring layers of colors and waiting for each to set a bit before the next.
Adding glitter or metallic powders can really make your pieces stand out.
Experimenting with Add-Ins
Adding different materials takes your resin jewelry to the next level. Some ideas include:
- Glow-in-the-dark pigments: These make your jewelry pop in the dark.
- Thermo-sensitive powders: They change color with temperature, adding fun to your craft.
- Electronic components: Add small LEDs or circuits for a techy look.
By trying out these add-ins, you create unique pieces that show off your personal touch and creativity in resin crafts.
Finishing Touches and Assembly
After waiting at least 24 hours, your resin jewelry is ready to be taken out and refined. Making resin jewelry involves a few important steps to make your pieces shine and look their best.

1. Sanding: Start by using fine-grit sandpaper to smooth your resin pieces’ edges and surfaces. This makes them look better and feel comfortable to wear.
2. Polishing: Next, apply polishing compounds to your sanded pieces. This step brings back the high-gloss shine that makes resin jewelry stand out. Make sure to use a soft cloth to prevent scratches.
3. Assembling: Now, add the necessary pieces like earring hooks, necklace chains, or bracelet clasps. It’s important to make sure everything is securely attached. This guarantees your jewelry is both durable and beautiful.
Adding stones or other items can make your jewelry unique. Use a little resin or glue to keep these items in place before the final pour.
If you want your jewelry to last even longer, think about adding a sealant. This extra step adds durability and protects against moisture. These tips will help you create jewelry that’s not only durable but also beautiful.
Expert Resin Tips for Beginners and Pros
Diving into resin jewelry making is an exciting journey. Here are some expert resin tips to help beginners and pros. They cover everything from simple mistakes to advanced hacks for DIY Epoxy projects.

Common Mistakes and How to Avoid Them
Resin crafting can be tricky, even for the experienced. Avoid these resin tips:
- Incorrect Resin-to-Hardener Ratios: Getting the mix right is key. A 1:1 ratio usually works best. Or else, the resin might not set right, ending up sticky or cloudy.
- Inadequate Curing Time: Don’t rush the drying. Give it at least 24 hours in a clean space for perfect results.
- Insufficient Mixing: Stir the resin and hardener well, but not too long. Aim for about 2 minutes to avoid too many bubbles.
- Ambient Temperature: Keep the room at 75°F to 80°F. Too cold and it slows down; too hot and it hardens too fast.
- Bubble Formation: Bubbles can form when mixing. Use a heat gun or lighter to get rid of them after you pour.
Advanced Techniques to Try
Ready to step up your game? Here’s how to add a twist to your resin jewelry:
- Doming: Layering the resin creates a domed look that really shines.
- Marbling: Mix different resin colors for cool patterns. Use tools like toothpicks to swirl them into marbling designs.
- Incorporating LED Lights: Tiny LED lights make your jewelry pop. Plan well to make these futuristic pieces stand out.
- Using Decorative Items: Add dried flowers, shells, or feathers. These bits bring a personal touch and add beauty.
Whether you’re just beginning or refining your craft, these resin tips and tricks will make your DIY Epoxy projects shine. Try these advanced ideas to turn your creations into masterpieces.
Caring for Your Finished Resin Jewelry
To ensure your resin jewelry stays beautiful, it’s crucial to follow certain care tips. Always keep your resin pieces in a cool, dry spot. Sunlight for too long can fade the colors and weaken the material. To avoid scratches, use soft pouches or lined boxes for storage. A lint-free cloth keeps them shining.
Cleaning resin jewelry is easy but needs care. Use mild soap and warm water; strong cleaners or rough cloths can harm the finish. If there are objects in your jewelry, make sure water or cleaners don’t damage them. After cleaning, use a soft cloth to dry and prevent water marks on the resin.
Looking after your resin jewelry is also key. Check often for signs of damage like cracks or a cloudy look. If you find these, you might need to fix or recoat them with a UV-resistant epoxy. It makes them look new and shiny again. Most resins cure in 24 to 48 hours, so plan fixes with this in mind.
The demand for resin jewelry is expected to hit USD 2.4 billion by 2025. This is thanks to a growing number of people making it themselves. With the right care, your resin pieces will keep their sparkle. This helps you stay on top of this booming trend.